Graphics Programs Reference
In-Depth Information
5. To accentuate the more difficult winding at the end, add a key to the
X
-axis rotation
through the Graph Editor. To do so, select the curve, and click the Insert Keys Tool
icon (
) in the upper-left corner of the Graph Editor. Your cursor changes to
a cross.
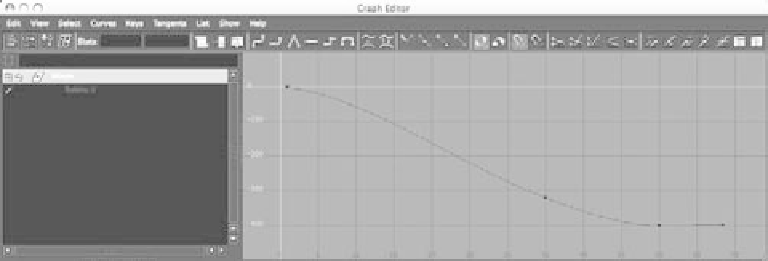
6. MMB+click frame 42 to add a keyframe already on the curve at frame 42. You can
drag the key back and forth on the curve to place it directly at frame 42. It may help
to turn on key snapping first. (See Figure 8.47.)
7. Move that keyframe down to create a stronger ease-out for the winch. Be careful not
to let the curve dip down so that the winch switches directions. Adjust the handles
to smooth the curve. You can also add a little recoil to the winch by inserting a new
keyframe through the Graph Editor at frame 70. (See Figure 8.48.)
Figure 8.47
Insert a keyframe
at frame 42.
Figure 8.48
Creating a greater
ease-out and add-
ing a little recoil
at the end
Animating with Deformers
It's time to animate the arm coiling back, using the winch's timing as it's driving the arm.
Because the catapult's arm is supported by a brace, and the whole idea of a catapult is
based on tension, you have to bend the arm back as the winch pulls it.