Graphics Programs Reference
In-Depth Information
Replacing the Axe
Load your completed, keyframed axe-animation scene (not the one using path anima-
tion), or switch to the Axe project and load the scene file
axe_v7.mb
from the CD. Now,
follow these steps:
1. Choose File
➔
Import.
2. Locate and import the
Axe_Replace.ma
scene file from the
Scenes
folder of the Axe
project on the CD. The new axe appears at the origin in your scene.
Transferring Animation
To assume all the properties and actions of the original axe requires some setup. Follow
these steps:
1. Move the pivot on the new axe to the same relative position as the pivot on the origi-
nal animated axe (up toward the top and a little out front of the handle, just under
the blade). This ensures that the new axe has the same spin as the old axe. If you
don't make sure the pivots line up, the animation won't look right when transferred
to the new axe.
2. Rotate the new axe's top node 180 degrees in
Y
to get it to face the right direction.
3. Use grid snap to place the top node of the new axe at the origin.
4. Freeze transforms on the new axe group to reset all its attributes.
5. Choose Display
➔
Transform Display
➔
Selection Handles to turn on the selection
handle of the new axe.
6. Go to frame 1. Select the original axe, open the Graph Editor, and choose Edit
➔
Copy.
7. Select the new axe to display its curves in the Graph Editor. It has no curves to dis-
play yet. With the axe node selected in the Graph Editor, choose Edit
➔
Paste. As
shown in Figure 8.30, the new axe is slightly offset from the original axe.
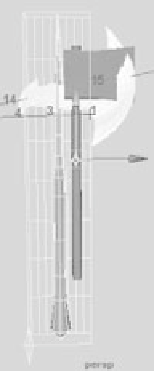
Figure 8.30
The new axe placed
next to the original
When you copy and paste curves in the Graph Editor, make sure you're on the first frame of
the animation. Pasting curves places them at the current frame. Because the animation of the
original axe started at frame 1, make sure you're at frame 1 when you paste the curves to the
new axe.
8. Move the new axe to match the original. Because it's already animated, move it using
the curves in the Graph Editor as opposed to moving it in the viewport. With the
new axe selected, in the Graph Editor, select the Translate Y curve; move it up to
match the height of the original axe.
9. Select the Translate X curve, and move it to match the axe's
X
position, as shown in
Figure 8.31. Line up the axe handle as a guide.
Figure 8.31
Lining up
the two axes