Graphics Programs Reference
In-Depth Information
Tire Summary
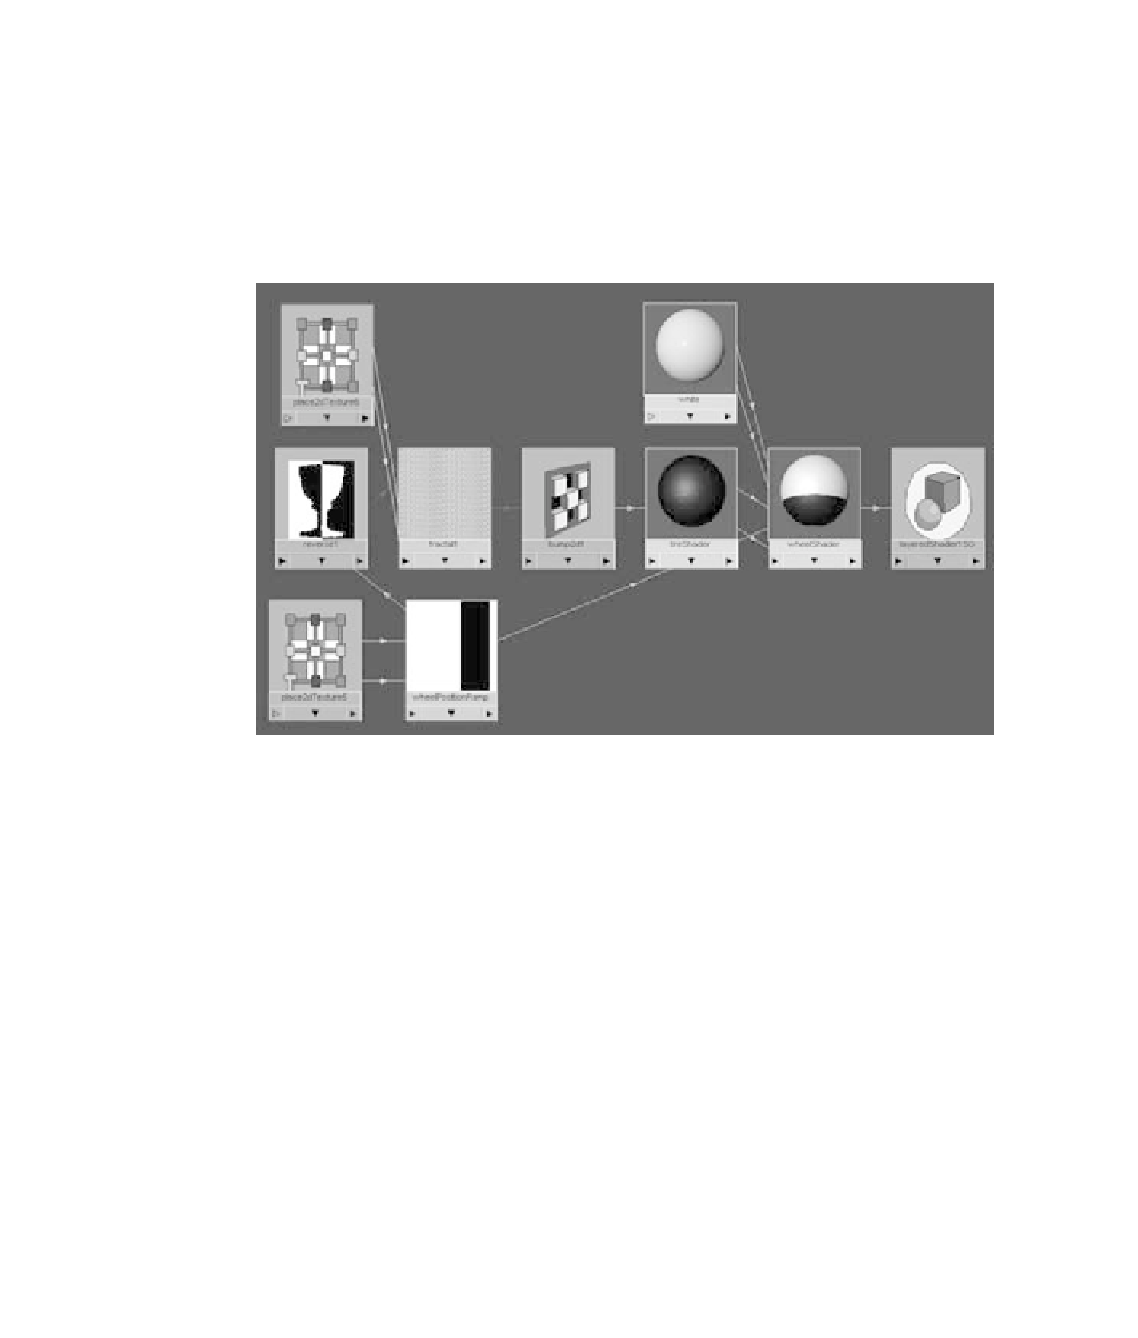
Congratulations! You've made your first somewhat complex shading network, as shown
in Figure 7.68. By now, you should have a pretty good idea of how to get around the
Hypershade and create shading networks. To recap, you're using a ramp to place the two
Tire and Rim shaders on the wheel, as well as using it to place the bump map on just the
tire by using a reverse node. The more you make these shading networks, the easier they
will become to create.
Figure 7.68
Your first complex
shading network
This type of shading is called
procedural shading
, because you used nothing but stock
Maya texture nodes to accomplish what you needed for the wheels. In the following sec-
tions, you'll make good use of image mapping to create the decals for the wagon body as
well as the wood for the railings.
You can load the file
RedWagonTexture_v01.ma
from the
Scenes
folder of the RedWagon
project to check your work or skip to this point.
Putting Decals on the Body
Figure 7.69 shows you the decals that need to go onto the body of the wagon. They
include the wagon's logo, which you'll replace with your own graphic design, and the
white stripe that lines the side panels.
Instead of trying to make a procedural texture as you did with the wheel, you'll create
an image map that will texture the side panels' white stripe. The stripe is far too difficult
to create otherwise. You'll create an image file using Photoshop (or other such image edi-
tor) to make sure the white stripe (and later the red wagon logo) lines up correctly.