Graphics Programs Reference
In-Depth Information
Texturing the Red Wagon
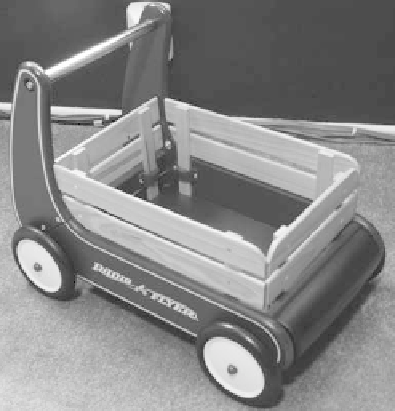
Using the wagon model from Chapter 6, you'll now assign shaders to the red wagon
shown in Figure 7.42. Take a good look at the image of the toy wagon in the Color
Section of the topic to see how the red
wagon is colored. The wagon is fairly
simple; it will need a few colored shad-
ers (Red, Black, Blue, and White) for
the body, along with a few texture
maps for the decals—which is where
the real fun begins. The wagon will
also require some more intricate work
on the shaders and textures for the
wood railings and silver metal screws,
bolts, and handlebar; these will be a
good foray into image maps and UVs.
Figure 7.42
The red wagon
This exercise is a prime example of how lighting and shading go hand in hand.
Assigning Shaders
Load the file
RedWagonModel_v08.ma
from the
Scenes
folder of the RedWagon project to
begin shading the finished model of the wagon.
Shading
is the common term for adding shaders to an object.
Study the color images of the wagon, and see how light reflects off its plastic, metal,
and wood surfaces. Blinn shaders will be perfect for nearly all the parts of the wagon.
Follow these steps:
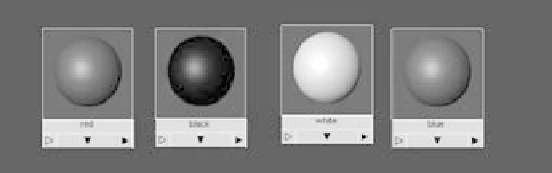
1. Open the Hypershade window, and create four Blinn shaders.
2. Assign the following HSV values to the Color attribute of each Blinn shader, and
name them as shown in Table 7.1 and in Figure 7.43. You'll create the Chrome Metal
and Wood shaders later.
Figure 7.43
Create the four-
colored Blinn
shaders.