Graphics Programs Reference
In-Depth Information
to enter Pivot mode (press Insert/Home) and move it manually to the center of the
hub. If the top wheel node's pivot isn't centered properly, animation will look weird.
Duplicate and place the wheels as shown in Figure 4.88. Make sure they all face out
properly and align as in the figure.
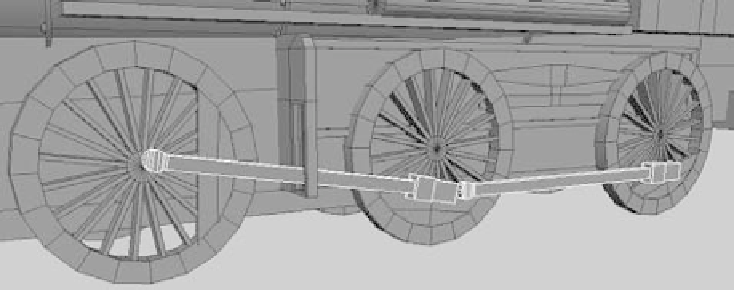
8. The wheel arms are next. These connect the wheels
to the steam drive that runs the locomotive. You
can use simple poly cubes to make the arms shown
in Figure 4.89. Place them as shown, and then rotate
the appropriate wheels (using the top large_wheel
node) so that they align with the connecting plates.
Notice that the arms go through the side panel
detail you created earlier with the undercarriage.
Group the arms together so you have one group on
either side of the train.
Figure 4.88
Duplicate and place
the wheels.
Figure 4.89
Add the wheel arms
to the wheels to
drive the locomotive.
The Small Wheels, the Axle, and the Steam Pumps
They sound like a trio of fifties rockabilly bands, but they're actually the last parts of the
locomotive that you'll build in this chapter. The small wheels up front are the same as
the larger wheels, except they don't have the connector plate and they have a solid back-
ground. You just need to copy one of the large_wheel groups and scale the top node down
from 1.0 to 0.575. Delete the connector plate on the side, and place a cylinder behind the
wheel to close the back. Remember to group this new closing cylinder into the top node.
Call the group
small_wheel
.
Figure 4.90 shows a small wheel in position.