Graphics Programs Reference
In-Depth Information
Adding Details
You'll include some detail by adding bolts to the front boiler cap and the weld plates. This
will introduce you to the process of copying multiple objects into position automatically,
otherwise known as
copying into an array
. To create the bolts, follow these steps:
1. Create a poly sphere by choosing Create
➔
Polygon Primitives
➔
Sphere
r
. In the
option box, set both Axis Divisions and Height Divisions to 6. Click Create. This
makes a crude sphere at the origin, perfect for a bolt. Scale the sphere down to 0.07
in all axes to make it the right size.
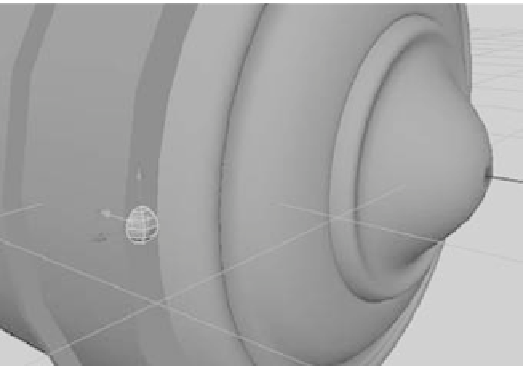
2. You need to duplicate this bolt many times to place bolts around the boiler cap and
the weld plates. Instead of moving them into position one by one, you'll create a cir-
cular array of bolts that you can group together and slap on the boiler. Move the bolt
to the boiler cap, and place it on the left side of the boiler cap, halfway into the sur-
face, as shown in Figure 4.50.
Figure 4.50
Place the bolt on
the left side.
3. Enter Pivot Placement mode by pressing Insert (Home on a Mac, or fn + Home on a
Mac laptop) to move the pivot of the bolt to the center of the boiler cap, and then exit
Pivot Placement mode by pressing Insert (Home) again.
4. You need to copy 19 more bolts to go around the boiler cap at 18-degree intervals,
pivoting around the center of the cap. To do so, select the bolt, and choose Edit
➔
Duplicate Special
r
. In the option box, set Number Of Copies to 19, and set a value
of 18 for Rotate
Z
, as shown in Figure 4.51. Click Apply to copy the bolts all the way
around the boiler cap. The copies array themselves around their common pivot point
(the center of the boiler plate) at 18-degree intervals.
If you make the copies without moving the pivot point of the original bolt to the center of
the boiler cap, none of the 19 copies will be arrayed into a nice circle around the boiler. They
will end up in different configurations.