Graphics Programs Reference
In-Depth Information
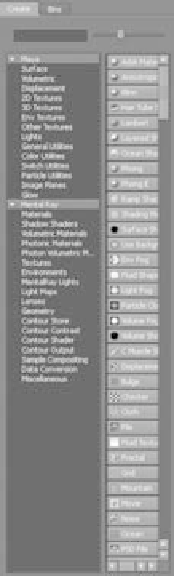
The Create/Bins Bar
The Create/Bins bar or panel is divided into two tabs: Create and
Bins, as shown in Figure 3.23. Selecting the Create tab gives you access to a variety of
render nodes. The Bins tab adds a level of organization by letting you store sets of shad-
ers in different bins to sort them. By default, Maya selects the Create tab. Here you can
create any render node and its supporting textures by clicking the icon for the desired
shader or texture. The bar at the top switches between Create Maya Nodes and Create
Mental Ray Nodes. You'll deal exclusively with Maya shaders in this topic; the mental
ray renderer is a more advanced topic. In the Create Maya Nodes panel, render nodes are
divided into sections for their types, such as Surface (or material nodes), 2D Textures,
Lights, and so on.
The Render Node Display Area
After you create a render node, it appears in the display
area as a thumbnail icon as well as in the work area and is available for editing. Clicking a
render node's icon selects that node for use. Double-clicking the icon opens the Attribute
Editor. You can also use the middle mouse button to drag the icon to the work area,
where you can create or edit the render node's connections to other nodes to form shad-
ing networks. Navigating in this area of the Hypershade, as well as in the work area, is
similar to navigating the Hypergraph and work windows in that you use the Alt/Option
key and mouse controls.
The Work Area
The work area is a free-form workspace where you can connect render
nodes to form-shading networks that you can assign to your object(s) for rendering. This
is by far the easiest place to create and edit complex shaders, because it gives you a clear
flowchart of the network. You can add nodes to the workspace by MMB+clicking and
dragging them from either the display area of the Hypershade or the Multilister window.
Figure 3.23
The Create/Bins bar
The Graph Editor
To use Maya's Graph Editor, select Window
➔
Animation Editors
➔
Graph Editor. It's an
unbelievably powerful tool for the animator (see Figure 3.24), that you use to edit key-
frames in animation.
Because 3D data is stored digitally as vector information in mathematical form, every
movement that is set in Maya generates a graph of value versus time. The Graph Editor
gives you direct access to the curves generated by your animation, which means you have
unparalleled access to editing and fine-tuning your animation.
The Graph Editor is divided into two sections. The left portion, which is much like the
Outliner, displays the selected objects and their hierarchy with a listing of their animated
channels or attributes. By default, all of an object's keyframed channels are displayed as
colored curves in the display to the right of the list. However, by selecting an object or an
object's channel in the list, you can isolate only those curves that you want to see.