Graphics Reference
In-Depth Information
4. Align the Head and the
Hole
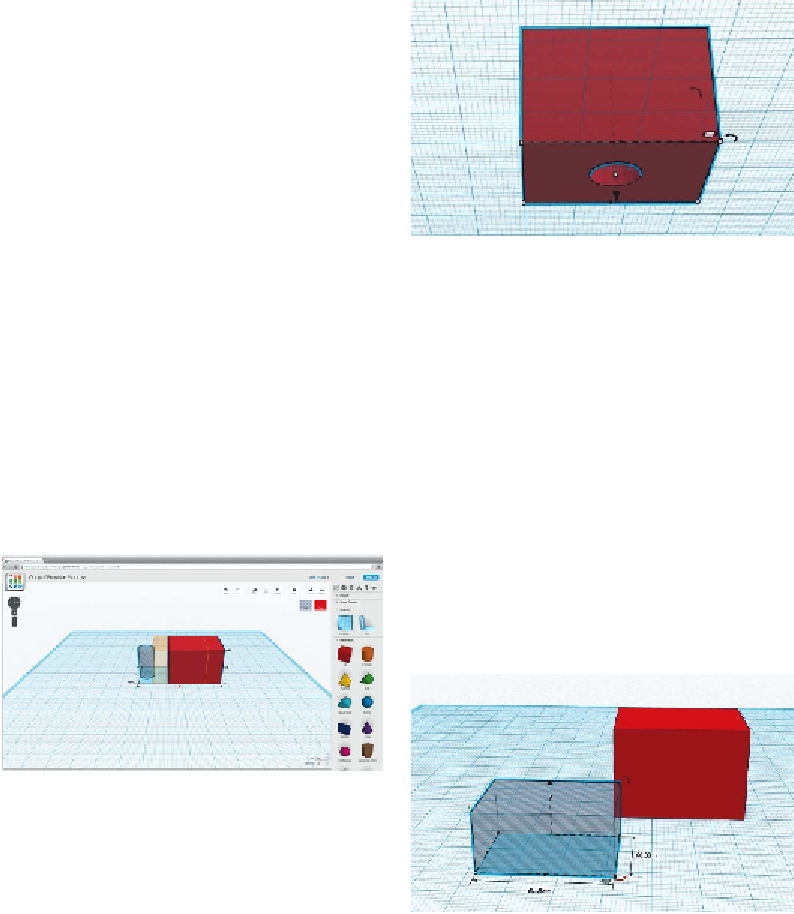
To make sure the hole is in the center of the
box, use the handy Align tool. Select both the
box and the hole cylinder by Shift-clicking
each object, or click-dragging your cursor to
create a Select box around them, or using
Ctrl-A (Cmd-A on a Mac) on your keyboard
to select everything. Look for the small gray
circle with three white lines next to your se-
lection. Click it and select Align.
Tinkercad will highlight both objects with
alignment dots. Click the two middle dots on
the horizontal plane to position the hole in
the center of the box (
Figure 4-3
). Don't cen-
ter the hole on the vertical axis because that
would seal the hole entirely inside the box,
which would make it impossible to fit a pen-
cil in the bottom.
Figure 4-4.
Combine into a single object
6. Make the Head Hollow
Make a hole box to put inside the robot's
head. Size it 4 mm smaller than the head in
both width and depth. This will leave the
head with 2 mm-thick walls.
We don't want the inside to be completely
hollow, as we need material at the bottom to
hold the pencil in place. So, leave about 10
mm of material at the base by making your
hole box 10 mm shorter than the head. In my
case, the interior hole is 30 mm wide × 20
mm deep × 14 mm high (
Figure 4-5
).
Figure 4-3.
Align the head and the hole
5. Combine the Head and
Hole into a Single Object
Select both pieces and combine them into a
single object by clicking the Group icon
(
Figure 4-4
).
Figure 4-5.
Create an interior hole
Use the Align tool to align the hole box to the
top of the robot head, by selecting the top-
most vertical dot (
Figure 4-6
). Now select just
the hole box and use the arrow handle to
move it down 2 mm (
Figure 4-7
).