Graphics Reference
In-Depth Information
2. Make a Hole
To make the hole that your pencil will fit into,
measure the width and height of a pencil
eraser. It's about 8 mm at the widest point,
so click and drag a cylinder onto the Tinker-
cad “workplane” (the blue grid) and scale it
to 10 mm diameter. This will provide 1 mm
of wiggle room all around the pencil. To scale
something in Tinkercad, first select it by click-
ing on it, then click on one of the small white
rectangles situated around the object—
these are called handles—and drag it.
To scale the shape uniformly in all directions,
hold the Shift key while dragging.
The height of the eraser is about 20 mm, so
stretch the cylinder to 20 mm using the top
handle. Don't use the Shift key here because
you want to stretch only the height, not the
diameter.
Figure 4-1.
A negative space object
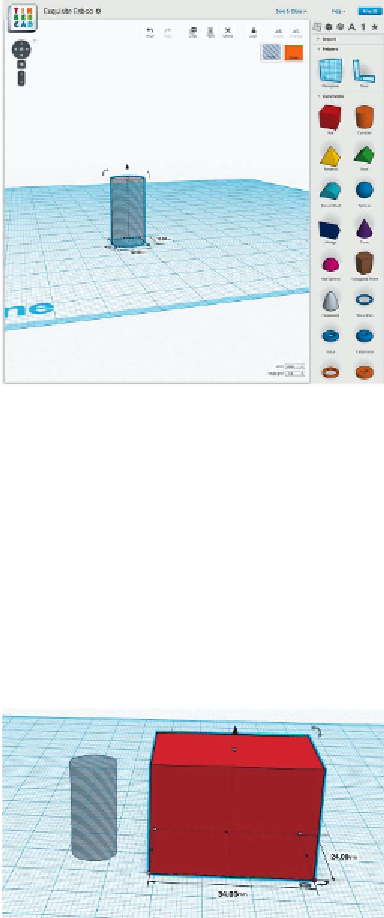
3. Make the Robot Head
Make a box for the robot head. You can make
it any size, as long as the width and depth
will encompass the negative cylinder with at
least 1-2 mm on each side. I made a head
that was 34 mm wide × 24 mm deep × 24
mm high, and placed it alongside the hole
(
Figure 4-2
).
Now, with the cylinder selected, click the
Hole icon (next to Color in the upper-right
corner of the workplane window). This will
turn the cylinder into negative space, indi-
cated by gray stripes (see
Figure 4-1
).
If you make a mistake, use the Undo
button or type Ctrl-Z (Cmd-Z on a
Mac) to undo the step.
It's often useful to view your design
from a different angle. To do this,
click on the arrow buttons in the
upper-left corner of the window.
The + and - buttons are for zoom-
ing and unzooming.
Figure 4-2.
Make the robot head