Graphics Reference
In-Depth Information
I think both approaches—welding and riv-
eting—are killer tools for 3D print finishing,
particularly for “blind riveting” into the side
of an object, and for joining parts made of
PLA, which is typically much harder to glue
than ABS.
Friction Welding
Mismatched Surfaces
I spent some time with Chris Hackett from
the Madagascar Institute learning how ideas
from traditional metal welding might apply
to friction welding 3D-printed parts. We ex-
perimented with the rotary tools in his work-
shop and came up with the following ap-
proach for creating a nice welded seam in
plastic, similar to a traditional metal weld.
When two printed parts don't mate perfectly
due to warp or poor planning, you can
friction-weld them together as securely as if
they were a single printed part. Here I'll
demonstrate with ABS parts and ABS fila-
ment. It works with PLA, too.
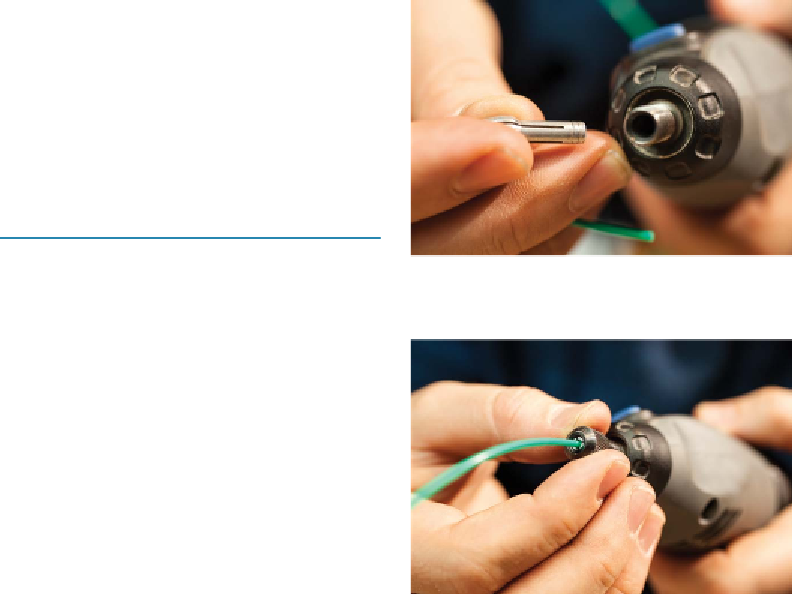
Figure 13-2.
Preparing the rotary tool
Figure 13-3.
Insert filament into tool
1. Prepare the Rotary Tool
Select the collet you need for trapping the
filament you'll be using. For 1.8 mm filament,
use a 3/32” collet as shown here (three rings)
and for 3 mm filament use a 1” collet (0 rings)
(
Figure 13-2
).
Trim the filament about 1/2” from the collet.
Short pieces are easier to control, and they
spin on a tighter axis. (With experience you
can use longer pieces, pressed gently at an
angle, to make longer welds. You may need
to straighten them by reforming them with
a heat gun.)
Insert a short length of filament into the col-
let jaws and tighten down the collet nut to
secure it in place (
Figure 13-3
).
2. Prepare Two Parts for
Welding
After scraping and sanding, the two watch
body cases shown in (
Figure 13-4
) meet with
a gap that varies between 0.1 mm and 2 mm
around the edges. That's too sloppy for glu-
ing, so I'll weld them.