Information Technology Reference
In-Depth Information
Making a Signature Field Read-only
In many circumstances, it is important that a signature field added to a document is converted to a read-only
field after signing.
You can define the action for the field by following these steps:
1. Follow the previous set of steps to draw and configure the field.
2. Click the Signed tab in the Digital Signatures Properties dialog box.
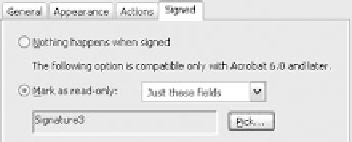
3. Click the Mark as read-only radio button, and choose Just these fields from the drop-down list.
4. Click Pick to open a list of the fields in the Field Selection dialog box.
5. Select the fields you want to define as read-only and click OK to close the dialog box. The fields
selected are listed on the Digital Signature Properties dialog box (Figure 10.14).
6. Click OK to close the Digital Signature Properties dialog.
Figure 10.14
Define a signature field as read-only to protect it after signing
Signing a Document
Blank signature fields are useful for an approval cycle, for instance, where a document is reviewed by
several people, each signing to specify their acceptance of the contents. If you need to protect a signature
further, you can sign a document and preserve the signature in a read-only field.
Follow these steps to sign and preserve a signature in a document that contains no other signatures:
1. Click the Sign task button's drop-down arrow and choose Sign This Document.
2. The Document is Not Certified dialog box opens, giving you the option to continue with signing, or
certify the document instead. Click Continue Signing to close the dialog.
3. The Sign Document dialog box opens. Choose either to display the signature or create an invisible
signature field, and click Next.
4. The dialog box closes, and the Signature tool is active. Draw a marquee on the document to define
the signature's location.
5. Release the mouse; the Apply Digital Signature - Digital ID Selection dialog box opens. Select the
digital ID to use for the signature (Figure 10.15).
6. Select a Digital ID persistence option on the dialog box. You can choose from three levels of
persistence: always use the same ID, use the same ID for the current program session, or ask each
time a digital ID is applied.
7. Click OK to select the signature and display the Apply Signature to Document dialog box (identical
in content to the Save as Certified Document - Sign dialog box shown in Figure 10.10).

Search WWH ::

Custom Search