Graphics Reference
In-Depth Information
your mouse over the main workspace,
press the universal key command to Add
an element:
Shift-A
. It offers you the
options of Scene, Movie, Image, and
Sound. Selecting
Scene
would add a strip
that pulled renders from the current scene.
Movie
lets you bring in movie files in
any format that Blender supports (AVI,
MPEG, and sometimes MOV).
Sound
brings in a sound.
Image
lets you import either a single image or an entire sequence at once. We want to
bring in the whole batch of images that we just rendered.
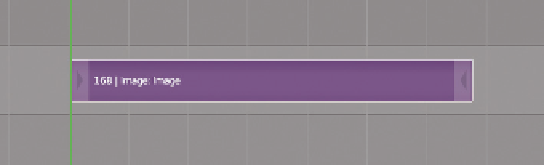
Figure 14.3
The imported image strip.
The easiest way to do this is to navigate to the folder that contains the images and use the A key to select
them all. LMB click the
Add Image Strip
button, and you are returned to the VSE.
Figure 14.3
shows
the imported image strip. The second VSE workspace in the upper right of the screen can be used to
show a preview of the Sequencer's output. That upper window doesn't have a header at the moment, so
show it by finding the + in its lower right corner and clicking it. With the header restored, you can change
the visualization from
Sequencer
to
Preview
on the pop-up menu.
With this window set to a Sequencer preview, LMB click in the lower Sequencer's timeline somewhere
inside the image strip. Whichever frame of your animation is at that location in time should display in the
preview window. You should even be able to LMB drag within the bounds of the added strip and see
the result immediately reflected in the preview, although high resolution OpenEXR images may take a
moment or two to display. By adding them as a sequence strip, all of the individual images you rendered
are treated like a single entity.
The imported image strip may or may not be in a useful position for you when it is first created. The
timeline in the Sequencer is no different than any of the other timelines in Blender: You want the strip
to start on frame 1. The easiest way to get the strip to frame 1 is to RMB select it and press the G key.
Be careful when you select the strip though—the left and right sides of strips are individually selectable as
well. In order to move the whole strip at once, you have to select it in the middle. Once it's selected and
moving with the G key, you'll see that the start and end frame for the current position of the strip are
displayed, and they change as you move it. Just move the strip until the beginning number is a 1, and
LMB click to drop it.
If all that you want to do is bring in a sequence of images and publish it as an animation, you're almost done.
A short trip to the Render properties finishes the job. Make sure that the pixel dimensions and frame rate
match up with your original settings for the animation, as the Sequencer will happily resample your original
work to the current settings if they are different. Choose one of the animation formats, depending on your
target.
The
Output
panel provides a number of options under the
Movie
section: AVI Raw, AVI JPEG, H.264,
Xvid, FFMpeg, and Frame Server. Ignore the two AVI formats. FFMpeg is the real workhorse of Blender's
video export. In fact, the H.264 and Xvid options are just shortcuts to banks of FFMpeg settings. So,
Search WWH ::

Custom Search