Graphics Reference
In-Depth Information
you do, an output socket named
Speed
is magically added to your
Render Layers node in the compositor. Each of these checkboxes, if
enabled, adds another output channel to the node, allowing you to
deal with these channels (called “passes”) individually if you like. For
now, though, let's be happy with Vector. You'll need to re-render
the scene at this point to generate the Vector (Speed) pass. Any time
you enable another pass in the Render Layers panel, you will have to
re-render before it is really available. With that in mind, it's probably
a good idea to consider what passes you will need
before
you even hit
the Render button for the first time, and enable them.
To add motion blur to the little example scene, use Shift-A to add a
Filter >
Vector Blur
node. Now we have to decide where to put
it: before or after the Defocus node. If we put it before Defocus,
things might go awry. The Z-channel that Defocus uses to make its
depth decisions comes straight from the render, while the image
would come from the Vector Blur node. Defocus might accidentally
apply blurring to a part of the image that has already been blurred by
the Vector node. On the other hand, the same thing could happen if
the order is reversed. If you defocus first, a portion of the image might
be motion blurred because of the Speed pass that has already been blurred.
In the end, this is going to be a judgment call, and it highlights one of the weaknesses of the compositor:
Nothing is perfect. Although the compositor has depth and other data made available to it from the ren-
derer, it still is only working with a flat image and there is only so much you can do. Trade-offs will have
to be made. Tests will have to be done.
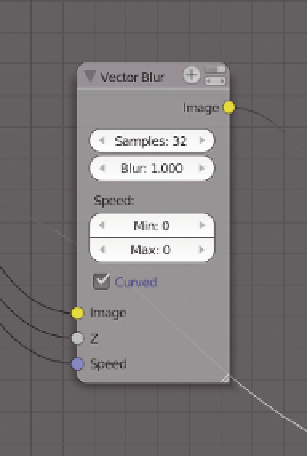
Figure 12.17
The Vector Blur node.
In this case, just try hooking up the node tree both ways and see which way looks most believable to you. You
might not even be able to tell a difference, which is great. In the example, I've hooked up Vector Blur before
Defocus. To do so, connect the Render
Layer node's Image, Z, and Speed outputs
to the Vector Blur inputs of the same name.
Connect Vector Blur's Image output to
Defocus' Image input. The node tree will
look like the one in the second part of
Figure 12.18
. Notice how the basic infor-
mation connections like Z and Speed
always go back to the Render Layers node,
but the image itself gets “threaded”
throughout the tree, the result of each node
passing on to the input of the next. This is
the basic method of working in the
compositor.
Figure 12.18
The image with Vector Blur added. The vase is falling.

Search WWH ::

Custom Search