Graphics Reference
In-Depth Information
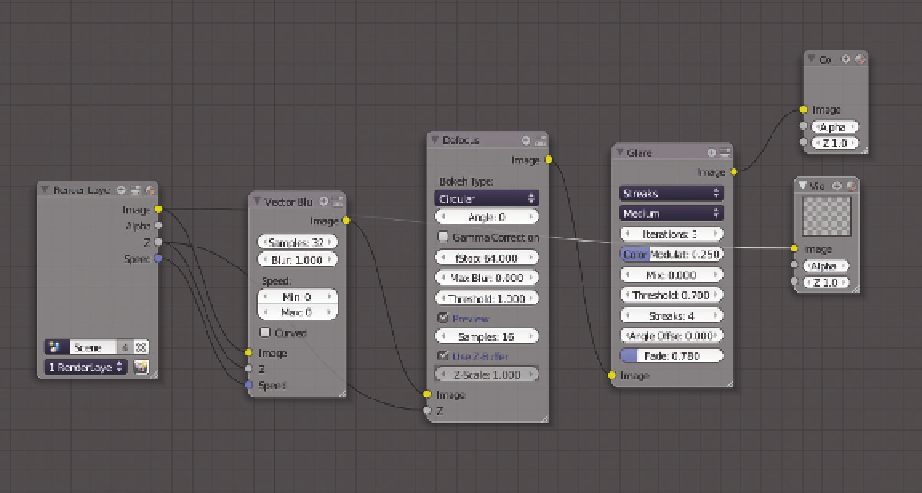
Figure 12.18, cont'd
Referring back to
Figure 12.17
, the relevant Vector Blur controls for most cases are Samples, Blur, and
Curved.
Samples
controls the quality of the result; 32 is the default, and might work for you. The effects
at very low values (like 5) are obvious. Once you hit a certain level of smoothness, though, raising the
number any further only wastes time.
Blur
controls how far back and forward in time the object's motion
is projected in order to generate the path of the blur. The default is 1.0, which means that the entire blur
will take place over one frame in time. If you're rendering frame 324, it will use the Speed vector to
determine where the object was at frame 323.5 and where it will be at frame 324.5. It splits the difference
around the current frame. So, if you want a longer or more pronounced blur, you raise the value. For a
shorter blur, drop it. Finally, the
Curved
option is slower, but provides a more accurate blur. If you think
about the way the node works—it finds two points, then creates a streak between them—you'll realize
that it won't work very well for objects that are rotating or traveling in an arc. The Curved option takes
those types of motions into account.
Glow and Glare
Glare is another one-shot node effect. The Glare node is found under
Add
>
Filter
>
Glare
. Its purpose
is to identify bright areas of the image and spread them out in various ways, hopefully achieving the kind
of bloom seen in photography.
Figure 12.19
shows the Glare node. By now, you should be able to put it into the growing node tree
without step-by-step instructions. Put it after the Defocus node, right before the Composite node. The
Search WWH ::

Custom Search