Graphics Reference
In-Depth Information
bone, with its
head
on the 3D cursor. The bone tapers toward its upper end, which is called the
tail
.
Just like working with mesh objects, armatures have both an
Object mode
and
Edit mode
. We would
like to work with the structure of the armature itself as opposed to manipulating it as a whole, so use the
Tab
key to enter Edit mode.
RMB selecting either the head or tail of the bone then transforming it with the G key will cause the
entire bone to stretch or shrink accordingly, like a rubberband. To transform a bone in a more normal
fashion, RMB select the long middle portion then use the G, S, and R keys. Bones are deleted by select-
ing them and pressing the X key.
New bones are added to an armature either with the Shift-A key, which immediately adds a bone at the
3D cursor, by selecting and Shift-D duplicating existing bones, or by selecting the head or tail of an exist-
ing bone and using the E-key extrude command. Note that all of these methods map directly to the same
skills and commands used in mesh editing. What works there generally works here.
Once the first bone is added, the goal is to get something that looks like
Figure 9.2
. Notice in the figure
how the armature bones don't necessarily represent every bone in a real body. What they really represent
are bridges between joints, or points of articulation. When designing your own rigs, keep that in mind so
you don't overcomplicate things.
We'll start with the spine, neck, and head. Go into a side view. We want to keep the spine bones directly
down the center of the character (from left to right), and working
in side view assures us that we won't accidentally move them off the
left-right axis. In the
Object
context of the Properties window, find
the
Display
panel and enable
X-Ray
. This option lets you see the
armature, regardless of whether or not it is behind or inside another
object. You can do armature construction in Wireframe or Solid
view, but I prefer to work in Solid. It gives me a better feeling for
what is what (all those wires can get confusing!) and works quite
well with X-Ray enabled.
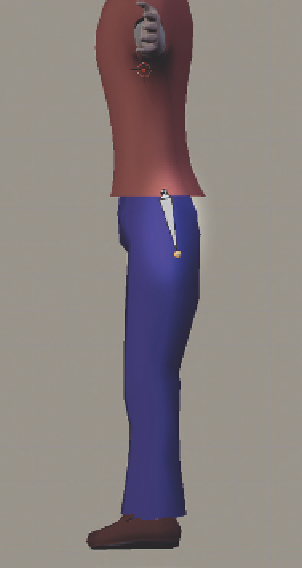
Making sure that you're in Edit mode (check the 3D header if you're
not sure), grab the bone and try to position its head near the top of
where the pelvis would be and its tail at the bottom of the crotch
(or “inseam” for the squeamish), angled slightly backward like
Figure
9.3
. You can do this either by grabbing the entire bone, and
using the G, S, and R keys to transform it into place, or by first
grabbing the head and moving it appropriately, then doing the same
with the tail.
Use the RMB to select only the head of the bone (the fat end). To
create our next bone, press the
E
key to extrude a new bone. After
you extrude, the new bone is automatically selected and in Transform
mode, following your mouse. Move it straight up to meet what
would be the bottom of the character's rib cage, and click the LMB
Figure 9.3
Placing your first bone.
Search WWH ::

Custom Search