Graphics Programs Reference
In-Depth Information
enabled (View > Pixel Preview).
Tip
To learn about working with text and anti-aliasing, see the PDF named
TextAntiAliasing.pdf in the Lesson_extras folder in the Lessons folder.
When the pixel-aligned property is enabled for an object, all the horizontal and vertical
segments in the object get aligned to the pixel grid, which provides a crisp appearance to
strokes. When you create a new document, you can set the Align New Objects To Pixel Grid
option at the document level by choosing Web from the Profile menu in the New Document
dialog box. This makes all artwork (that is able to be aligned to the pixel grid) align to it
automatically. You can also align content to the pixel grid later, as you will do in this
section.
1.
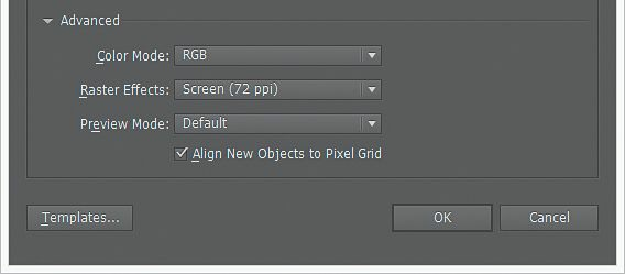
Choose File > New. In the New Document dialog box, choose Web from the Profile
menu. Click the triangle to the left of the Advanced content, toward the bottom of the
dialog box.
In the Advanced settings, you can see that the Color Mode is RGB for all artwork you
create, the Raster Effects are 72 ppi, and Align New Objects To Pixel Grid is selected.
2.
Click Cancel.
3.
In the webdesign.ai file, choose File > Document Color Mode and you will see that
RGB is selected.
After you create a document, you can change the document color mode. This sets the
default color mode for all
new
colors you create. RGB is the correct color mode to use
when creating content for the web or for on-screen presentations.
4.
Select the Zoom tool ( ), and drag a marquee around the orange Gallery button (the
first on the left), to zoom in very closely.
Tip