Image Processing Reference
In-Depth Information
4.4.2 Using the Levels Function to Color an
Image
You already learned how to use the
Levels tool
(tonality correction) to
increase the contrast and color values of an image. And you know that this
function allows you to edit the color channels separately (sections 2.5.8
and 2.6.3). Similarly, the brightness and contrast can be edited in grayscale
images by selecting
Value
in the
Channel
drop-down menu (top left of the
Levels
window). Moreover, on black-and-white photos, you can add (or
mix) optional colors by modifying a single color channel (i.e., blue) or by
editing all three channels (red, green, and blue) at once.
Start by selecting a color channel from the
Channel
drop-down menu
(top left) to edit
the color range. In
this exercise, you
will edit the
blue
channel. Move the
mid-tones
slider—
the middle triangle
on the grayscale
bar underneath
the histogram
curve—to select
the desired color.
If you want to use
a mixed color for
your image, select
a second color
channel and repeat
the process. This
process will colorize
all image areas
equally according
to their brightness.
Using the sliders
for shadows (the black triangle under the histogram curve) and for highlights
(white triangle), you can adjust the brightness and contrast of the image.
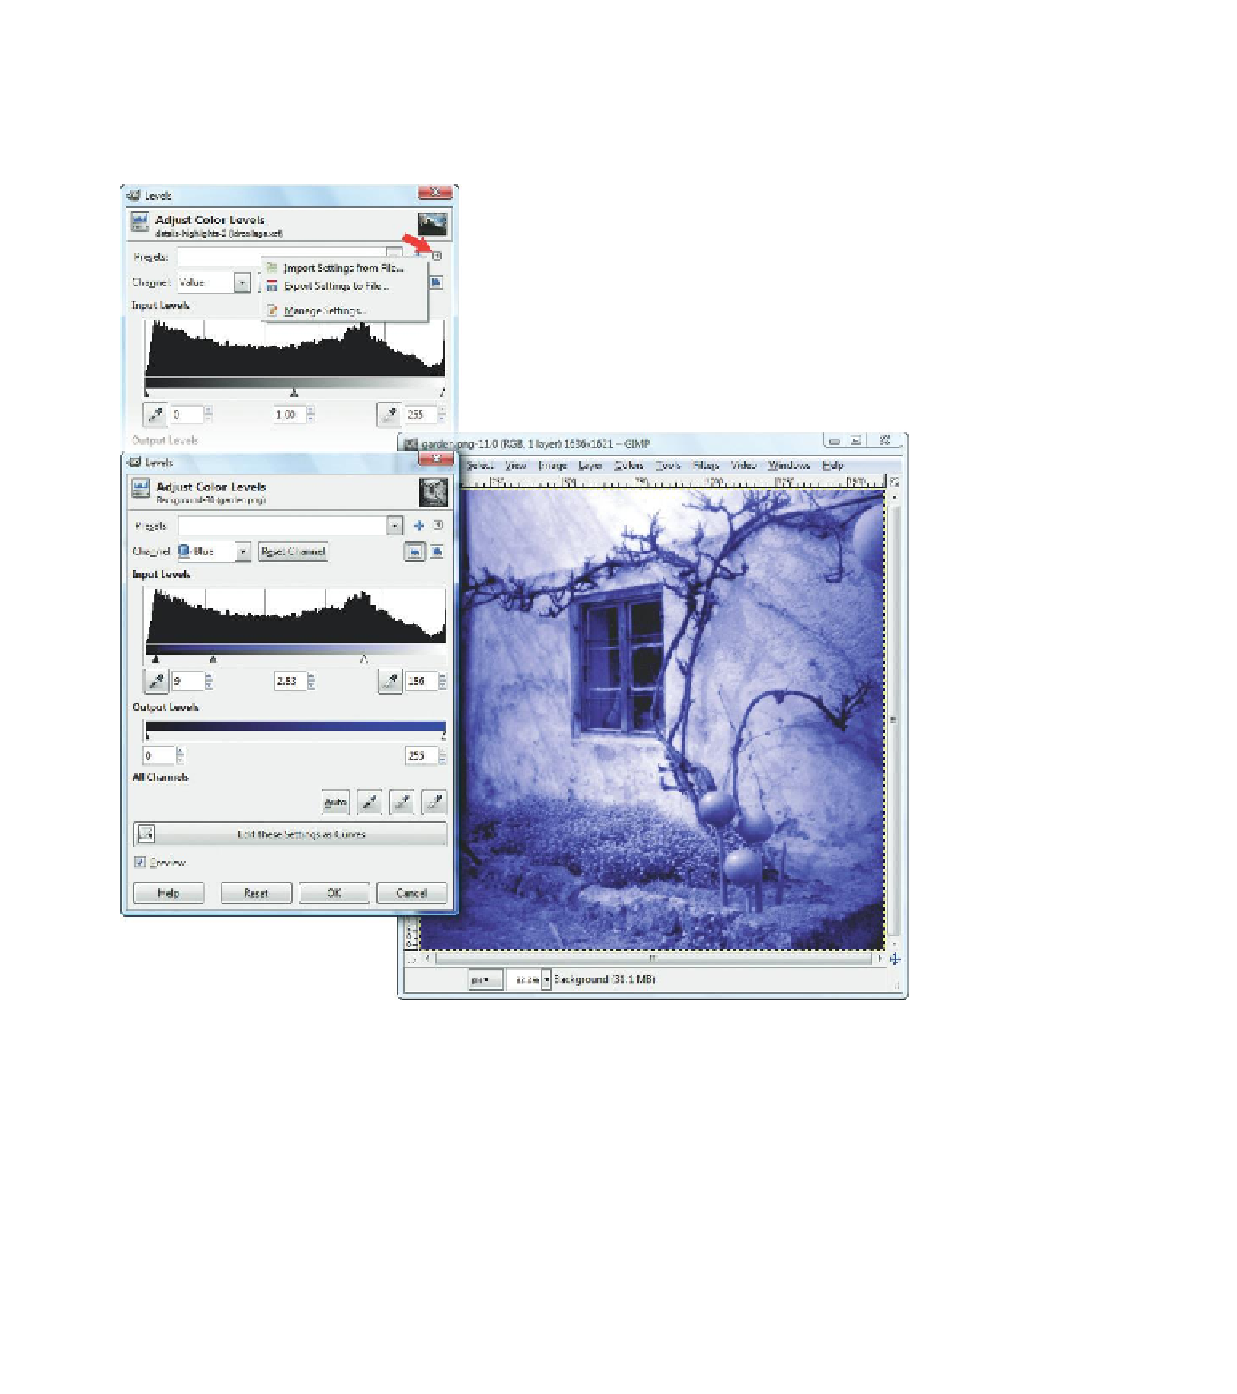
If you want to use the same option settings to colorize several images,
simply click the small arrow button, top right in the
Levels
dialog window. In
the menu that opens, , choose
Export Settings to File
to save your settings in a
folder. To apply the settings to other images, just click the arrow button again
and choose
Import Settings from File
.
Figure 4.29
The Levels options dialog. At top,
the options for saving settings


Search WWH ::

Custom Search