Image Processing Reference
In-Depth Information
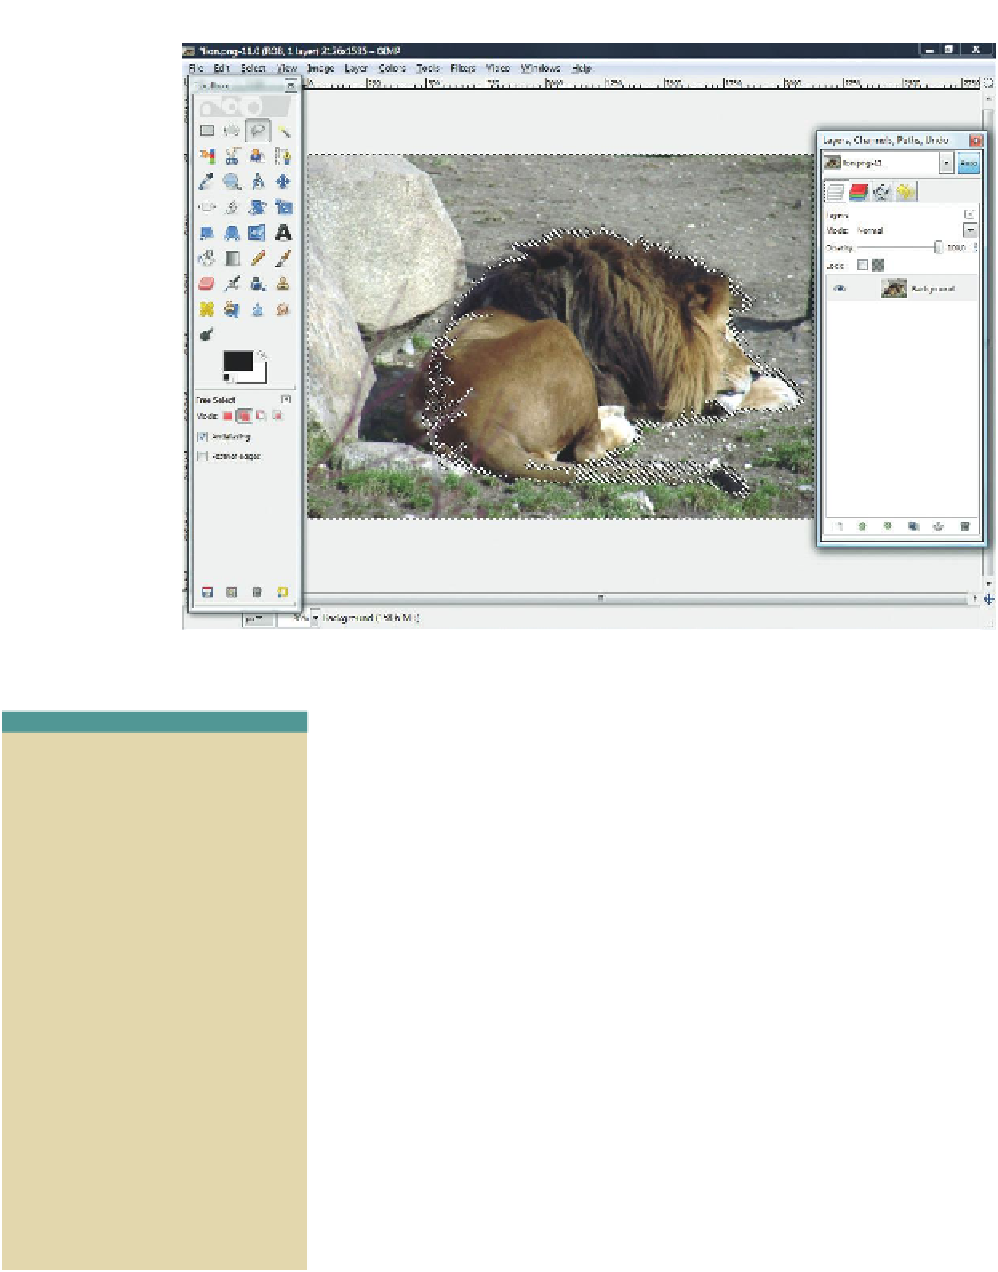
Figure 3.106
The selection around
the lion was created
by using first the
Fuzzy Select tool
for the contour and
then the Free Select
tool for selecting the
background area
completely.
The next step is to switch into masking mode. It shows you the covered
area of the image (the red “protection layer”). Now you can start editing
the mask with selection and paint tools. Switch to masking mode by either
clicking the
Toggle Quick Mask
button in the lower-left corner of the image
window or choosing
Select > Toggle Quick Mask
.
• Fill the mask with the paintbrush with a 50% hard brush pointer using
various sizes. You could also scale the brush over the tool settings to
fill the holes around the lion and, if needed, trace the contour of the
lion. Using the same brush pointers and the
Eraser tool
, remove the red
masked areas within the lion. You can enlarge the image with the
Zoom
tool
. Take your time and work accurately.
• Check your result by switching back and forth between the masking and
the selection modes using
Toggle Quick Mask
.
• If you are satisied with the result, switch to selection mode.
• Use the
Clone tool
to remove the grass and twigs still showing on the
lion's back and tail. The twigs on the lion's back can also be removed by
using the
Healing tool
.
• NOTE
When in
Quick Mask
mode, selected
areas in an image appear in natural
colors. A red transparent layer, the
mask, covers the other areas in the
image. These sections of the image
are exempt from further editing.
You can see where the mask
reaches into the surface of the lion's
body. This has to be painted with
white or the
Eraser tool
to erase the
mask. You can also see the holes and
inexact contours around the lion.
These will have to be filled, either
by painting the mask with black or
by selecting an area and filling it
with black. The mask can be edited
further with the paint tools as well
as with the select tools and color
fillings.
The lion is selected and the unwanted elements have been removed. In
the next steps, you are going to extract the lion.
• Give your selection a soft edge of about 5 px using the
Select > Feather
menu item.


Search WWH ::

Custom Search