Graphics Programs Reference
In-Depth Information
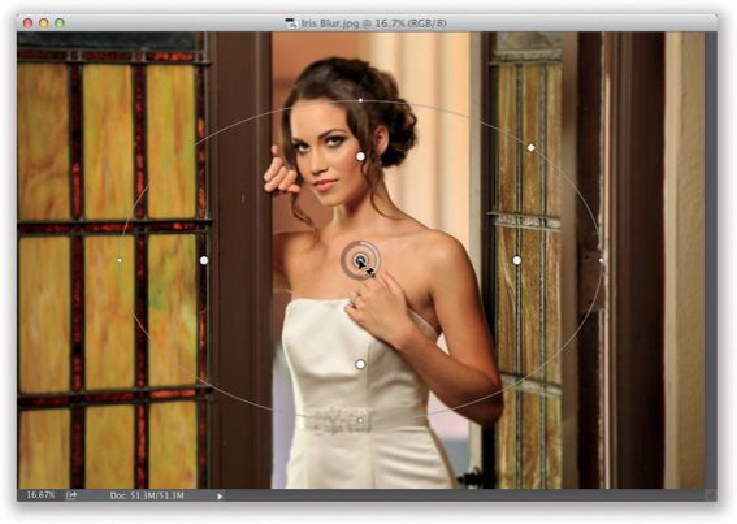
Step Three:
We want our focus squarely on the bride, so we're going to make our oval thinner (so it's
closer to her body), and we're going to rotate it to the left so it matches her pose. To shrink
in the sides of the oval, click on the small dot on either side of the oval and drag inward
toward the bride. Now, take that same dot and drag upward a bit, and it rotates the oval (as
shown here). To stretch the oval out longer, click on one of the top or bottom small dots
on the oval and just drag it out. You can reshape or rotate the oval any time to fit whatever
shape you need (within the constraints of an oval, of course). So, here we have our tall, thin
oval positioned over our bride. By default, it applies a slight blur to everything outside this
oval, but the default setting is so low you can barely even see it's there.