Graphics Programs Reference
In-Depth Information
Scanning Resolution for Transparencies
What resolution should you scan your slides and negatives? The answer is, it depends. Many of my clients no
longer have a working slide projector but would like to be able to see their slides again. Usually, they want
to view them as a slide show on their television or computer monitor. For that purpose, scanning them at
an ultra-high resolution isn't required. I find that scanning them at 400-600 DPI works well for viewing on a
monitor or television screen, particularly in high definition.
However, the best option is scanning at a resolution to provide the highest quality image data.
I normally scan them at a
minimum
of 1200 DPI, while scaling up to 4"
×
6" for 35mm slides and negatives
and 6"
×
6" for 126 slides. Scanning at 2400 DPI or more is a better option, if the image will be printed at
8"
×
10" or larger. Most modern scanners are capable of resolutions well beyond 2400 DPI.
The reality is that scanning at such a high resolution creates a large file size, but you are capturing
sufficient image data to provide adequate image quality. Trying to get a decent 8"
×
10" print from a slide
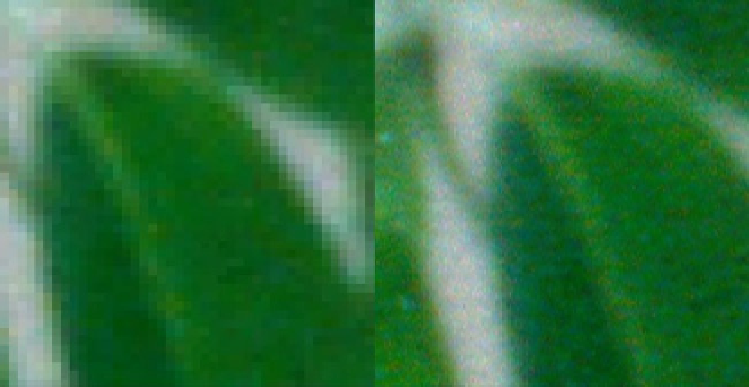
scanned at 300 DPI will only disappoint. Looking at the enlarged example, it's easy to see how much more
jagged the leaf on the left is from a 300 DPI scan, compared to the same leaf from a 1200 DPI scan, both
taken from the same 35mm color negative (Figure
2-13
).
Figure 2-13.
An enlarged section of a 300 DPI scan, compared to one at 1200 DPI, from a 35mm color negative
Straightening and Cropping Your Images
The images you work with will sometimes require straightening out by leveling the horizon line. Sometimes
the original photograph has an irregular shape, and squaring it perfectly on the scanner's bed is difficult, at
best. Other times, the photographer may just have held the camera at an odd angle, resulting in a crooked
image. Following are the steps to straighten an image in GIMP:
1.
Scan the image into GIMP (
Image Menu
➤
File
➤
Create
➤
Scanner/Camera
).
Select your scanner when prompted. The following sample image (
ch2_tilted
ocean.jpg
) is also included in the Practice Images available for download from
the Apress companion web page (mentioned in the Introduction), if you'd like to
use it to follow along.
2.
Select the
Rotate
t
ool (Shift + R).
In Tool Options, make sure that the Corrective
(Backward) button is active and that Crop to result is active. Set the number of
lines to 25. Move the slider until the closest guide is parallel to the horizon line
(Figure
2-14
).
Search WWH ::

Custom Search