Graphics Programs Reference
In-Depth Information
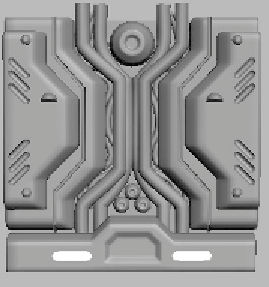
Here I've added a few bolts in the corners of the panels. This
time I used a spline to create an inset groove along the second
tier panel. I achieved this look by, again, using the Normal
modifier. The final step was adding some little half hemi-
sphere light fixtures to the left and right panels.
Figure 20-8
Render to Texture — Normal Maps
Since for this example I've chosen to show you how to create
a flat texture for a surface, you'll only learn the basics of Ren-
der to Texture. In character modeling you would actually
remodel all of the parts in low poly while still trying to capture
the basic shape of the objects. Since we're doing a wall texture
we'll just use a rectangle, so draw another spline rectangle of
100 x 100 and convert to an Editable Poly. Place this new
object behind all of the other objects as seen from the Front
viewport.
With this new object selected, hit the zero key on the key-
board (
not
the one on the num pad). This opens up the Render
To Texture dialog.