Graphics Programs Reference
In-Depth Information
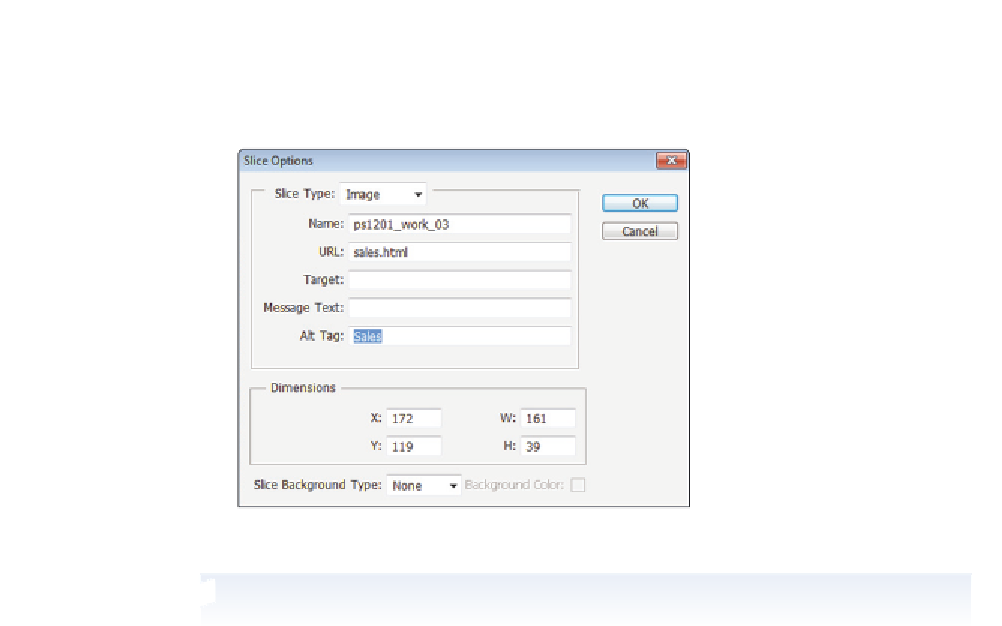
4
Ty p e
Sales
into the Alt Tag text i eld and click OK.
Enter the URL and Alt Tag information.
Your HTML i le must be saved inside the ps12lessons folder in order to have a working link.
5
Now, select the slice containing the text
Service
, and choose the Set options for the
current slice button in the Options bar. The Slice Options dialog box appears.
6
Ty p e
service.html
into the URL text i eld and
Service
in the Alt Tag text i eld.
Click OK.
7
Select the slice containing the text
About
, and choose the Set options for the current
slice button in the Options bar. The Slice Options dialog box appears.
8
Ty p e
about.html
into the URL text i eld and
About Us
in the Alt Tag text i eld.
Click OK.
9
Select the slice containing the text
Contact
, and choose the Set options for the current
slice button in the Options bar. The Slice Options dialog box appears.
10
Ty p e
contact.html
into the URL text i eld and
Contact Us
in the Alt Tag text i eld.
Click OK.
11
Choose File > Save. Keep the document open for the next part of the lesson.
For this lesson, you do not put an alt tag on each slice, but we recommend that you assign a
descriptive alt tag to each slice when producing images for the Web.