Graphics Programs Reference
In-Depth Information
In addition to some standard Photoshop features, some
need-to-know
new features have
been integrated into this lesson. As you can see by investigating the Layers panel for
this image, many of the new features in this lesson relate to new and exciting vector
capabilities.
4
Now that you have seen the i nal image, choose File > Close. If a Warning dialog box
appears, click No (Windows) or Don't Save (Mac OS).
Experimenting with new Vector capabilities
In this part of the lesson, you will learn to append custom vector shapes, apply a pattern to
them, and adjust the stroke and i ll.
1
Choose File > Browse in Bridge. If you do not already have the contents of the
ps01lessons folder open, click the Favorites tab in the upper-left of the Bridge
workspace, and then choose Desktop. Locate the ps01lessons that you copied from
your DVD to the Desktop.
2
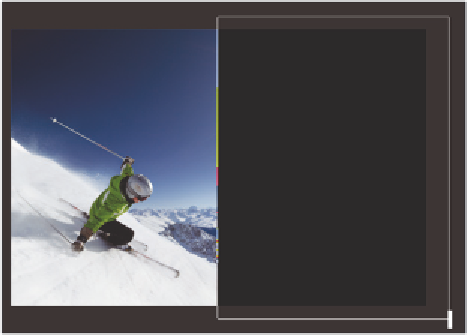
Open the ps01lessons folder and double-click to open the ps0101.psd i le. An image of
a skier appears.
3
Choose File > Save As to open the Save As dialog box. Using the Save In drop-down
menu, navigate to the ps01lessons folder. Type
ps0101_work
in the File Name text
i eld and choose Photoshop from the Format drop-down menu. Then click Save. If
the Photoshop Format Options dialog box appears, click OK.
4
Select the Rectangle tool ( ) located directly above the Hand tool in the Tools panel,
and then click and drag to create a large rectangle that covers the right half of the
image. When you release the mouse, notice that a Rectangle 1 vector layer has been
added in the Layers panel.
You will now i ll this rectangle with a pattern by taking advantage of some of the new
vector features that have been added to Photoshop CS6.
Click and drag to create a large rectangle across the right side of the image.


