Graphics Programs Reference
In-Depth Information
2
Return to Adobe Bridge by choosing File > Browse in Bridge. Navigate to the
ps05lessons folder and double-click on ps0501.psd to open the image. An image of a
car appears.
3
Choose File > Save As. When the Save As dialog box appears, navigate to the
ps05lessons folder. In the Name text i eld, type
ps0501_work
. Choose Photoshop
from the Format drop-down menu and press Save. If the Photoshop Format Options
dialog box appears, press OK.
4
Select the Rectangular Marquee tool ( ), near the top of the Tools panel.
5
Make sure that Snap is checked by choosing View > Snap. If it is checked, it is already
active.
6
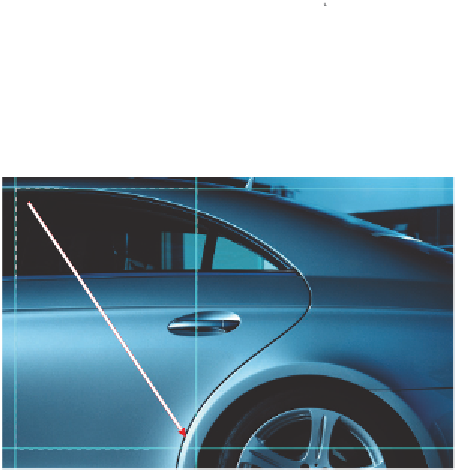
Position your cursor in the upper-left side of the guide in the car image, and drag a
rectangular selection down toward the lower-right corner of the guide. A rectangular
selection appears as you drag, and it stays active when you release the mouse.
Creating a rectangular selection in the image.
You'll now apply an adjustment layer to lighten just the selected area of the image. You
are lightening this region so that a text overlay can be placed over that part of the image.
7
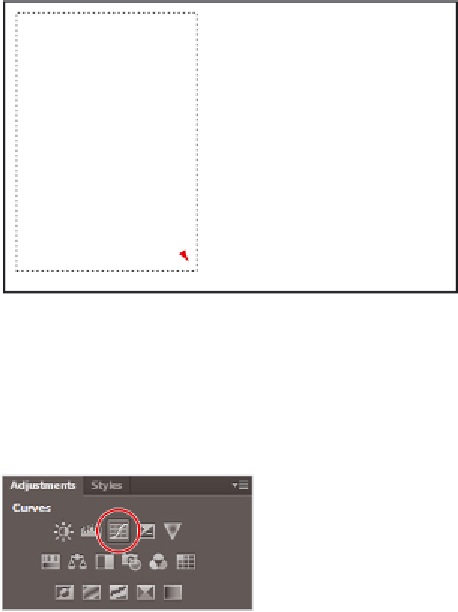
If the Adjustments panel is not visible, choose Window > Adjustments and click on
the Curves icon; the Properties panel appears.
Click on the Curves button to create a new
Curves adjustment layer.