Graphics Programs Reference
In-Depth Information
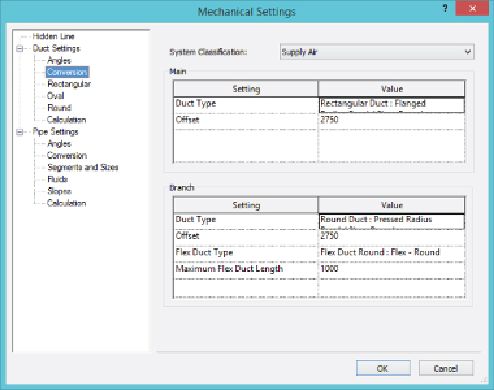
Figure 10.15
Mechanical settings
Now you're ready to use automatic duct routing. Here's how:
1. Place your VAV box, ensuring that it is located at the correct height. You
can change it later if needed, but this may lead to you changing your
duct route. Sometimes it is worthwhile to place the unit at the correct
level and create a short run of duct from each connector. This gives you
the correct levels of ducts (and pipes) from which you can then adjust
the default height (Offset), as described in step 8.
2. Place your air terminals. At this point, it is a good idea to consider the
following, not from a design point of view but from a Revit one:
• What type are the ceilings (if any)?
• If there are ceilings, should you use face-, ceiling-, or level-hosted
families?
• Are you going to create your own placeholder ceiling to host your
families?
• Should you use the ability to copy/monitor the air terminals already
placed by the architect?
• Choose the type of air terminal. Is it top, side, or even sidewall
entry?