Graphics Reference
In-Depth Information
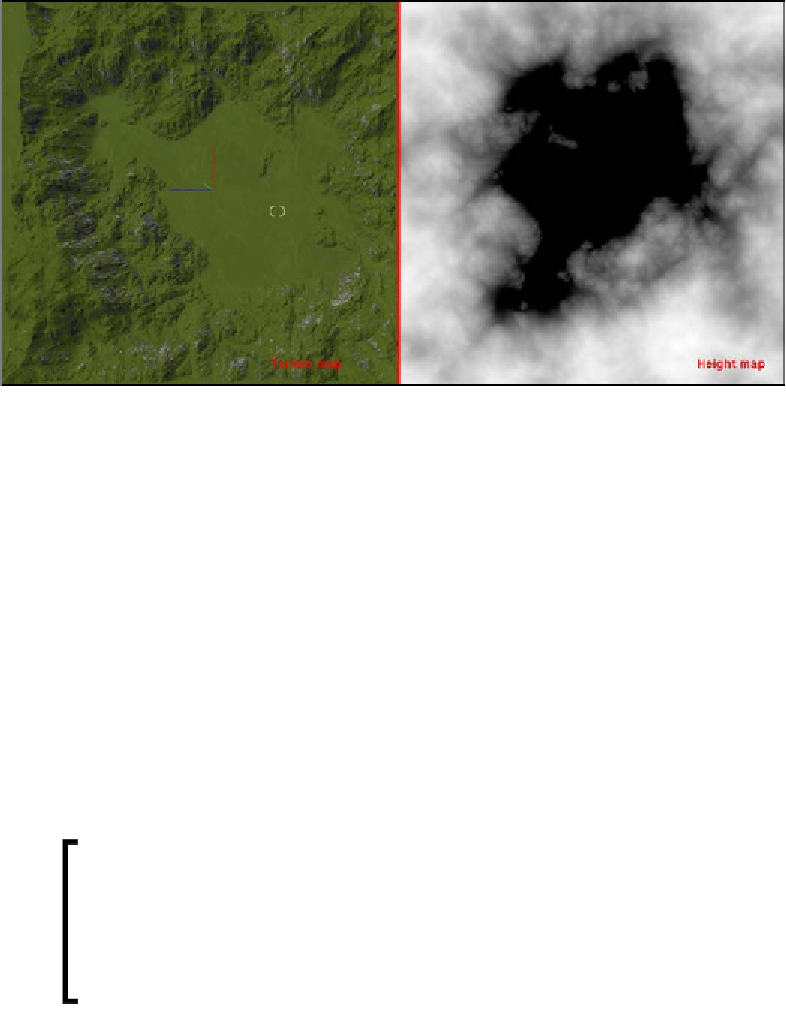
We can say that the terrain map is the result of a height map. Let's exemplify this
with the following screenshot:
The image on the left is the result of the Make Mountains button and the image on
the right is the height map that was used to create it. By importing an image like the
one shown previously, we can create a beautiful terrain full of detail. It is easy to
understand that the black color represents a flat surface while the scales of gray and
finally the white color represent the different altitudes. However, how can we create
an image like that and how does it work?
Creating a height map
We have at least two options to create a height map. You can use any of the
techniques by following the given instructions:
•
Using Adobe Photoshop and GIMP
The first method is using Adobe Photoshop or GIMP to create this height map,
which can be a very tedious task and it is more difficult to get good detail.
In order to create a height map, we need to download some texture tools.
Download NVIDIA texture tools for Adobe Photoshop from
the following URL:
https://developer.nvidia.com/nvidia-texture-
tools-adobe-photoshop
Download the GIMP DDS plugin from the following URL:
https://code.google.com/p/gimp-dds/