Graphics Reference
In-Depth Information
By now, you probably have added this effect to your scene and have started exploring
how it works. The result by default is already amazing, and the effect becomes more
noticeable when we are using materials with textures and lots of variations. The likely
question in our head is: how does each setting affect the scene?
Although we could read a long explanation for every setting, perhaps the best way
to understand how each setting works is by playing with the values, and in this case,
we will see comparisons between different values and how they change the image.
The Painting effect is created by the combination of five different settings.
The first setting we need to set from the beginning is not
Smear size
but
Impression
,
and the following screenshot helps us to understand why:
The
Impression
setting is the one that defines the strength of the effect, which means
that if you feel the scene would be enhanced by reducing a little bit of the Painting
effect,
Impression
is the setting to use.
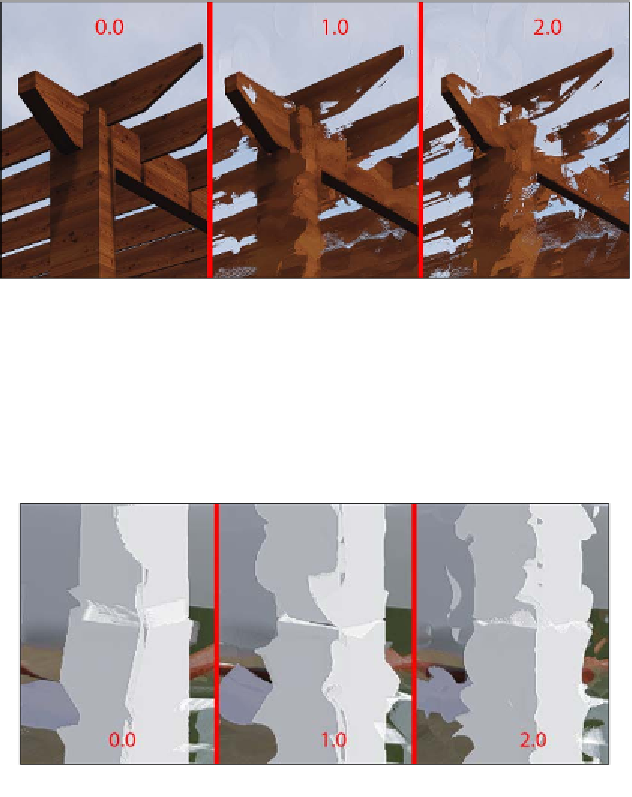
Now that we have set the mood, we can start tweaking the different elements that
create the painting. The first setting is
Smear size
, and the values we can use go from
0
to
2
and the following screenshot shows the difference between each value: