Graphics Reference
In-Depth Information
Next, we have to select
Clone Stamp Tool
(
S
), and to use this tool, we have to hold
down the
Alt
key, click on a specific point in the image, and then paint the area that
needs to be corrected. After a few adjustments, we should have a perfect image to be
used in the 3D model.
Using UVs in Lumion
Along with the texture, we can also use the UV's that are created in 3D modeling
packages, such as 3DS Max, Maya, Blender and Modo, just to mention a few. UV
mapping refers to the way each 3D surface is mapped to a 2D texture. This means
that if we have UVs on the surface, we can have accurate control of how the texture
is presented on that surface. The following image shows an example of how UVs are
used to control the way that the texture affects the surface:
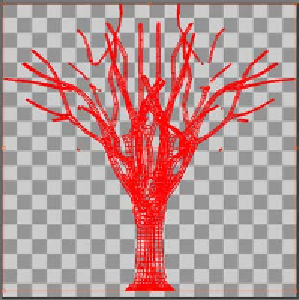
In this case, we have the UVs for a tree, but if we want to use these UVs to control the
texture in Lumion, we have to use the
Standard
material that is found in the
Custom
tab. After importing the 3D model, we need to click on the
Edit Materials
button
found in the
Import
menu and assign a new material to the 3D model. Then, on the
Custom
tab, we will click on the
Standard
material to assign this material, but don't
worry; you are not going to lose the texture. What we have to do now is set the
Scale
slider to
0
, as shown in the next screenshot: