Graphics Programs Reference
In-Depth Information
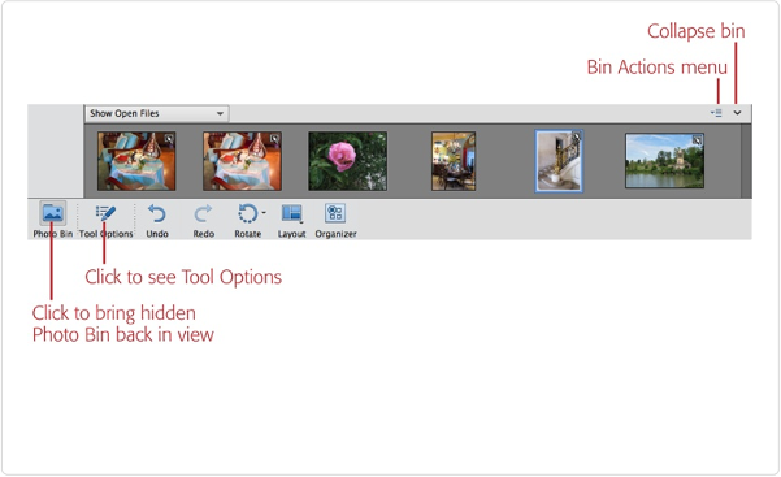
Figure 1-7. The Photo Bin at the bottom of the Editor window holds a thumbnail of every open
photo. Click the arrow in the bin's top-right corner to collapse it, and use the button at the bottom
left to bring it back. Clicking the Tool Options button displays settings for the tool you're currently
using.
The Photo Bin/Tool Options area is fixed in place: You can't move it anywhere else or resize
it. However, you can hide it by clicking the down-pointing arrow at the right end of the light-
gray bar just above it (labeled in
Figure 1-7
), or by clicking the Photo Bin button (when the
Photo Bin is visible) or the Tool Options button (when the Tool Options are visible). This
gives you more space, but it also hides the settings for your tools, so it's hard to do much
work with it hidden. To bring it back, click either the Photo Bin or Tool Options button at the
bottom of the window. (This behavior is the same in both the Basic and Custom workspaces.)
There's more about how to use the Tool Options on
Elements' Tools
.
The rest of this section
is about the Photo Bin.
The Photo Bin does a lot more than just show which photos you have open. For example,
you can drag photos' thumbnails in the bin to rearrange them if you want to use the images
in a project. The bin also has two drop-down menus:
▪
Show Files
. This menu at the bin's upper left lets you determine what the Photo Bin dis-
plays: the photos currently open in the Editor, selected photos from the Organizer, or any
albums (
Albums
) you've made. This menu even lets you send files from the Organizer to
the bin without actually opening them. Simply click photos to select them in the Organ-