Hardware Reference
In-Depth Information
5.
Now type in the following command to build MJPG-streamer with support
for V4L2 devices:
pi@raspberrypi ~/mjpg-streamer $ make USE_LIBV4L2=true
6.
Once the build process has finished, we need to install the resulting
binaries and other application data somewhere more permanent, using
the following command:
pi@raspberrypi ~/mjpg-streamer $ sudo make DESTDIR=/usr install
7. You can now exit the directory containing the sources and delete it, as we
won't need it anymore:
pi@raspberrypi ~/mjpg-streamer $ cd .. && rm -r mjpg-streamer
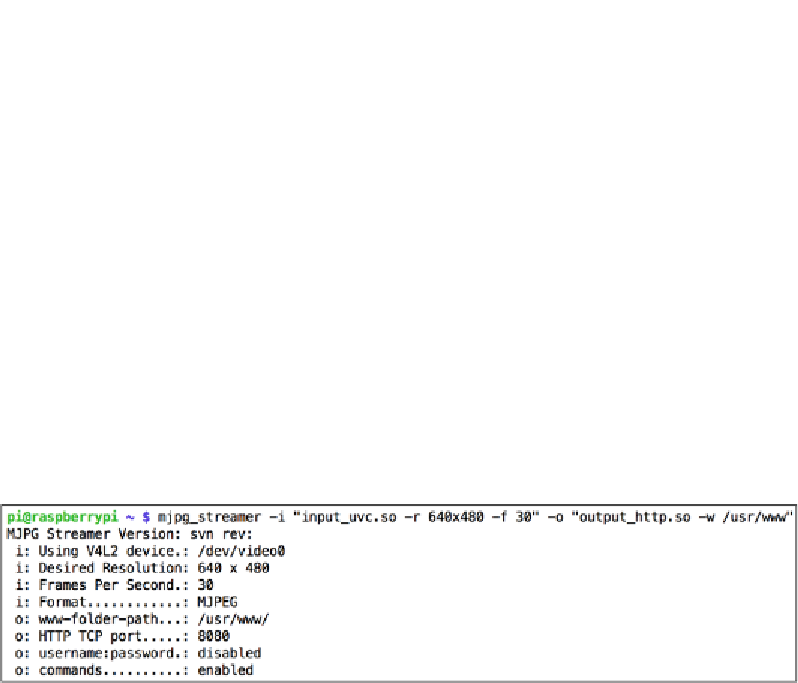
8. Let's fire up our newly-built MJPG-streamer! Type in the following
command, but adjust the values for resolution and frame rate to a moderate
setting that you know (from the previous section) your camera will be able
to handle:
pi@raspberrypi ~ $ mjpg_streamer -i "input_uvc.so -r 640x480 -f
30" -o "output_http.so -w /usr/www"
MJPG-streamer starting up
You may have received a few error messages saying
Inappropriate ioctl for
device
; these can be safely ignored. Other than that, you might have noticed
the LED on your camera (if it has one) light up as MJPG-streamer is now
serving your camera feed over the HTTP protocol on port
8080
. Press
Ctrl
+
C
at any time to quit MJPG-streamer.
9.
To tune into the feed, open up a web browser on a computer connected to the
same network as the Pi and enter the following line into the address field of
your browser, but change
[IP address]
to the IP address of your Pi:
http://[IP address]:8080