Graphics Programs Reference
In-Depth Information
3.
One thing that you'll notice about this view is the section box. In other situations, the
scope box would create a limit for what you could change, because anything outside the
scope box would effectively disappear within the view. Because the changes you are
making using the Displace Elements tool are only view specific and not actually manipu-
lating model content, you can leave the scope box where it is.
So that it doesn't interfere with the view, however, you can turn it off. Right-click the
scope box and choose Hide In View
➢
Element from the context menu.
4.
Now, you can begin displacing elements. When using this tool, elements will be grouped
based on selection. So, if you were to pick multiple elements and then displace them, they
would all move together, keeping a relative distance to one another.
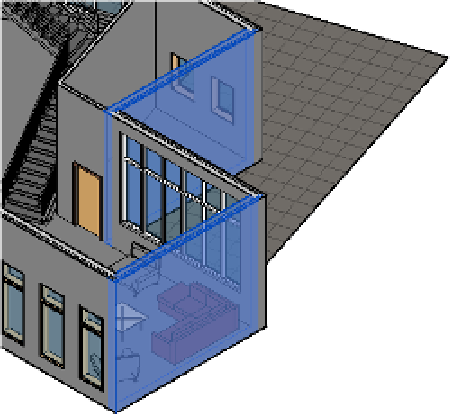
To demonstrate this, select both of the walls on the right of the view (Figure 20.23).
Figure 20.23
The first selection
for displacement
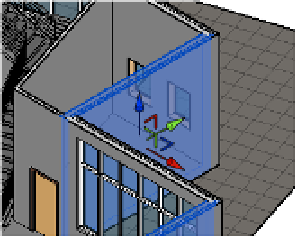
5.
Select the Displace Elements tool from the View panel of the Modify tab. Both walls will
remain highlighted now, but you'll see a 3D control tool appear (Figure 20.24).
6.
Grab the red control (the one that points to the lower right) and pull it away from the
building.
Figure 20.24
using the 3D
control to move
the displaced
elements