Graphics Programs Reference
In-Depth Information
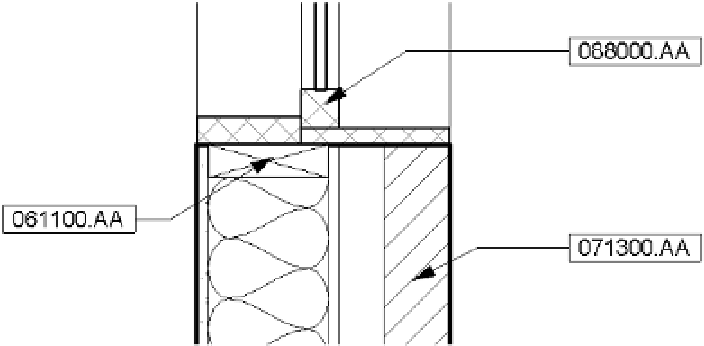
Let's explore this functionality with a quick exercise in which you will annotate a detail with
keynotes. Follow these steps:
1.
From the Project Browser, expand the Sections (Wall Section) heading and activate the
view named Window Sill Detail.
2.
Go to the Annotate tab in the ribbon and select Keynote
➢
Element Keynote on the Tag
panel.
3.
Select the window in the view and then place the leader and keynote.
You will see that the keynote code has already been populated because the keynote has
already been defined in the type properties for the window family.
4.
With the Element Keynote command still active, click the wood sill detail component and
place another keynote. This time, the Keynotes dialog box will appear because no key-
note was defined in the wall's type properties. Select the keynote labeled 061100.AA and
then close the dialog box.
5.
Go back to the Annotate tab in the ribbon and select Keynote
➢
Material Keynote.
6.
Select the cross-hatched material at the right side of the wall below the window. Again, the
Keynotes dialog box will appear because a keynote value was not defined in that mate-
rial's identity data. Select the keynote labeled 071300.AA and then close the dialog box.
The results will look like the image in Figure 18.17.
F igu r e 18.17
A section detail with
keynotes applied
Creating Keynote Legends
Depending on your choice of keynote and your workflow, you might want to create a legend on
each sheet for your notes. You might want only the keynotes that are shown on a given sheet to
appear in the legend. Or you might want to have one legend that will show all keynotes used
throughout the project.