Graphics Programs Reference
In-Depth Information
Figure 11.81
Rendering with
materials
Once you render the view and you can start to see the transparency and reflectivity
in the curtain panels, the rendering takes on a much more realistic effect. You can also see
the materials in the table and chairs as well as the lens for the linear light above the
conference table.
At the moment, all of the materials that are assigned to the walls in this view are based on
the properties of the wall. And creating surface materials for every different wall would result
in a very long list of wall types! A better method of assigning materials on a case-by-case
basis is to use the Paint tool. Just be aware that your modeled walls might continue beyond
the confines of the space in which you are designing, and painting a material on a surface may
affect other spaces.
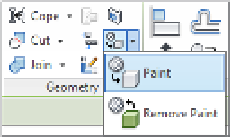
To assign materials to host elements, select the Paint tool on the Modify tab in the ribbon.
Select a material from the Material Browser, and then click on a surface in the model. If you
need to remove a painted-on material, use the Remove Paint tool from the same fly-out button
you used for the Paint tool.
Rendering in the Cloud
In addition to rendering on your own computer, Autodesk offers the ability to render “in the
cloud.” This term simply means that you will be sending data from your computer to remote
computers operated by Autodesk for increased processing power and more flexibility. As we
mentioned previously in this chapter, the rendering process can be time-consuming—especially
when you can't do any other work while renderings are being produced. The cloud option
becomes quite compelling when you consider the benefit of gained productivity.