Graphics Programs Reference
In-Depth Information
As of the writing of this topic, you can create a user account for free at
360.autodesk.com.
With a free account, you will receive some amount of complimentary cloud credits; however,
some cloud-rendering processes are free. For example, you can process a still rendering at
standard resolution without using any credits. This allows you to send many draft renderings
until you are happy with the results and then use your credits to produce the final rendering.
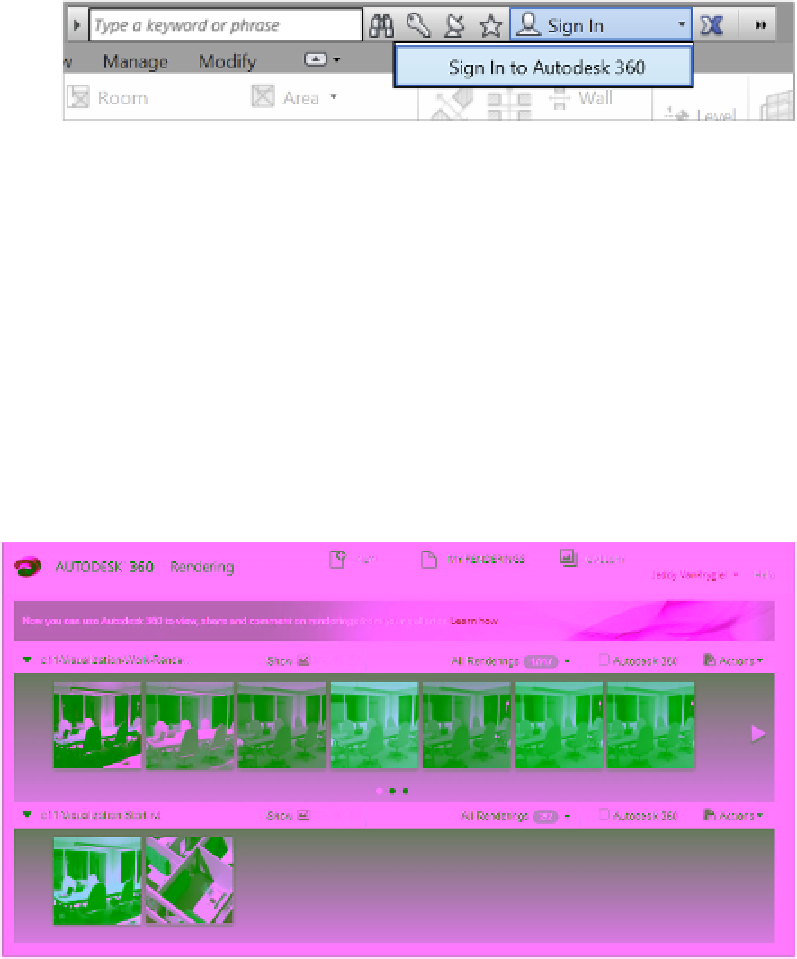
After you create a user account, you will need to connect to the Autodesk
®
360 service in the
Info Center at the top of the application window, as shown in Figure 11.82.
Figure 11.82
sign in to the
autodesk 360
service.
Once you are connected, you can use the Render In Cloud command from the View tab in the
ribbon. In the Render In Cloud dialog box, you can select multiple 3D views for rendering, the
output type (still image, interactive panorama, or illuminance), image size, exposure (advanced
or native), and file format. At the bottom of the dialog box, you can also choose to be notified via
e-mail when the cloud rendering is complete. Once you click the Start Rendering button, a small
amount of data will be uploaded, and then you can get back to work while the cloud works on
your renderings!
After you have been notified that your renderings have completed, you can access and share
the renderings from your Autodesk 360 web space (Figure 11.83). Each image has contextual
commands that include the ability to download the file and adjust the exposure levels.
Figure 11.83
Viewing renderings
on the cloud
rendering website