Graphics Programs Reference
In-Depth Information
5.
In the Add To Design Option Set dialog box, add the wall to Option 1 but not Option 2, as
shown in Figure 10.61.
Figure 10.61
adding elements to
option sets
Note that when the elements are added to the option set, you immediately lose the ability
to select them within the main model. This is because an option called Exclude Options in the
status bar is checked by default. The purpose of this option is to support a workflow in which
design options are explicitly edited. Otherwise, it is assumed you are working exclusively
on other parts of the building design. Of course, you can disable this option at any time by
deselecting the check box in the status bar.
editing Design Options
Selecting a design option to edit allows you to enter a special mode called Edit Option mode. In
this mode, you can add elements you've already created in the main model or create them from
within the option set. The elements that are not inside this option set turn light gray, indicating
that they are not editable.
Entering Edit Option mode is quite easy. From the drop-down list in the Design Options
toolbar or from the Design Options panel in the Manage tab, select the option you want to begin
editing (Figure 10.62). In our example, we chose Option 2.
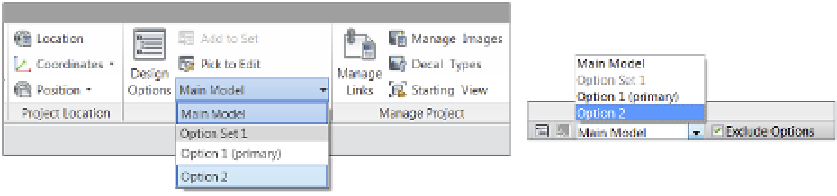
Figure 10.62
accessing edit
option mode
Once you have entered Edit Option mode, you will notice that the wall you added to Option
1 is not visible. Add one horizontal wall dividing the space, as shown in Figure 10.63. Note that
anything else you add to the project while in Edit Option mode will be assigned to that design
option. You can also modify or delete any elements in the selected option in this mode.