Database Reference
In-Depth Information
1.
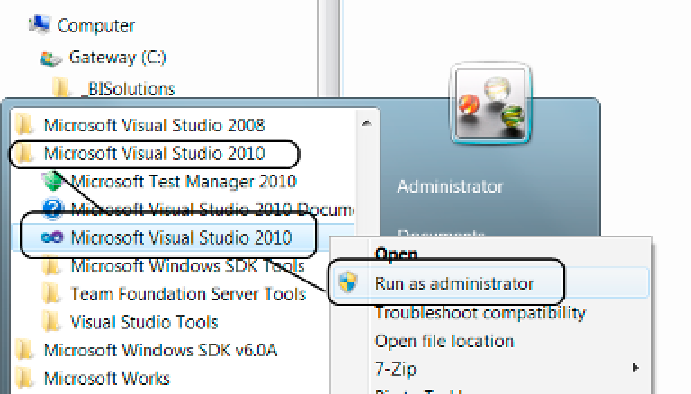
Open visual Studio 2010. You can do so by clicking on the Start button and
navigating to All Programs ➤ Microsoft visual Studio 2010 ➤ r. Right-click Microsoft
visual Studio 2010 to see an additional context menu (Figure
2-7
). Then, click on the
Run as Administrator menu item.
Figure 2-7.
Opening Visual Studio and running as admininstrator
2.
if the user Account Control (uAC) message box appears asking “Do you want the
following program to make changes to this computer?” click Yes (or Continue
depending upon your operating system) to accept this request.
3.
when visual Studio opens, select File ➤ New ➤ Project from the menu. (Do not use
the Create: Project option from the Start Page as you may have done in the past with
other types of solutions.)
4.
when the New Project dialog window opens, on the left side of your screen click the
arrow to expand Other Project Types and select visual Studio Solutions, as shown in
Figure
2-3
.
5.
in the templates section, select Blank Solution, as shown in Figure
2-3
. The Name
and Location textboxes are filled in with a default name, but we change these in the
next step.
6.
in the Name textbox, at the bottom of the screen, type the name
WeatherTrackerProjects
. in the Location textbox, type
C:\_BISolutions
(as shown
previously in this chapter in Figure
2-3
), and finally, click OK.
Once the solution is created, it appears in the Solution Explorer window of visual Studio, on the right side of
your screen.