Game Development Reference
In-Depth Information
Tips and Tricks
Depending on the texture being built, this new UV Guidelines may be
more effective with black lines. Remember a layer can have a stroke applied
(Edit>Stroke) or inverse the white lines to black (Image>Adjustments>Invert).
Painting the Texture
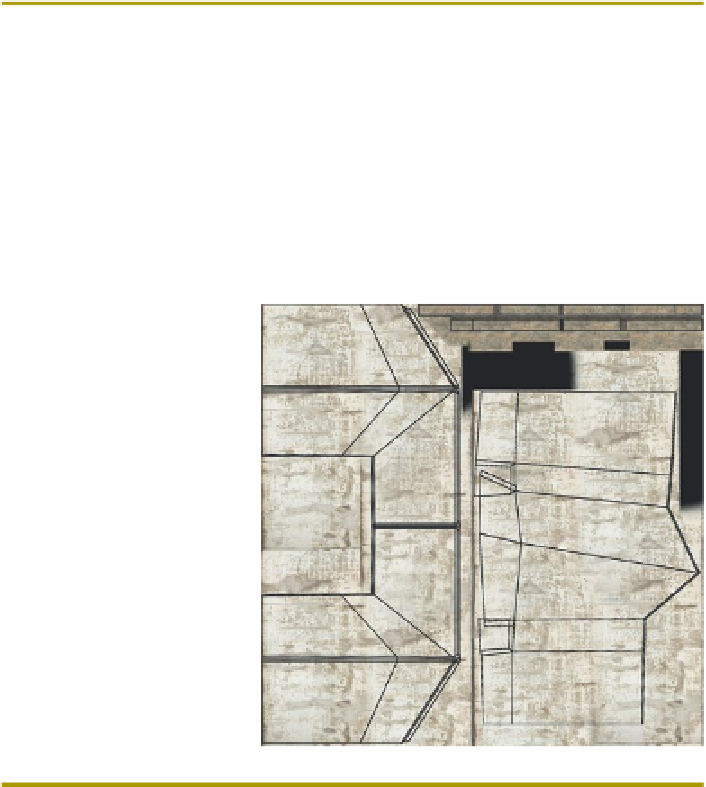
Step 5:
Lay down an initial color pass using photo reference.
Figure 4.12
shows
the results of my first pass. It is made with many copies of BunkerPainted0010
(
http://cgtextures.com/texview.php?id=47345
) for the white painted parts,
and ConcreteBare0314 (
http://cgtextures.com/texview.php?id=44689
) for the
cement floorboards. If you'd like to use these same textures the links are on the
supporting web site (
http://www.Creating3dGames.com
), although feel free to
use whatever you feel is most effective here.
Figure 4.12
Initial color pass.
Tips and Tricks
As much as possible, try and use nondestructive methods to cobble
together swatches of texture. My favorite way to do this is by applying
layer masks to each layer, and then paint out sections by painting black
on the mask. Then if I need some of that texture back later, I can just paint
it back in with white on the layer mask.
Step 6:
Find and download an image that provide some good grime for
corners.
Figure 4.13
shows ConcreteDirty0271 from CGTextures (
http://
cgtextures.com/texview.php?id=51950
). We're looking for a straight edge
(at the bottom of the image) and then an organic color shape next to that.
Don't worry about the stuff at the top of the image (we'll mask it out).
Step 7:
Import or cut and paste the image into the UV Snapshot. Scale it