Game Development Reference
In-Depth Information
Step 9:
Create the mouse over scripts to highlight each button as the mouse
moves over them. Create a new JavaScript. Name it
InventoryButtonScript
.
Open this script in your script editor and enter the following:
var buttonReg : Texture2D;
var buttonOver : Texture2D;
function OnMouseOver () {
guiTexture.texture = buttonOver;
}
function OnMouseExit(){
guiTexture.texture = buttonReg;
}
Why?
First we're declaring two variables, both of which are of type Texture2D,
which just means they are images used as textures. Then in a bit of code
that should look a bit familiar we say, “when the mouse is over this object,
go to the guiTexture component, and make its texture be buttonOver.
When we move out of this object, change the guiTexture's texture to be
buttonReg.”
This script will be assigned to each button, and for each button we'll drag
and drop the two versions of the texture for that button.
Step 10:
Save and return to Unity. Fix syntax problems.
Step 11:
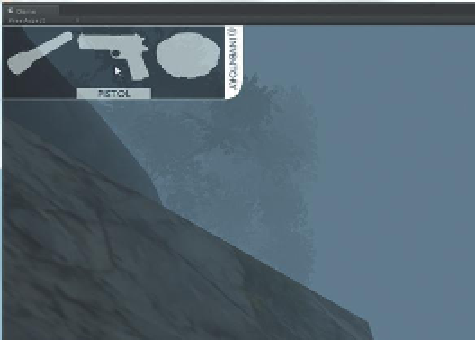
Assign this script to the EMP, Flashlight, and Pistol buttons in the
Hierarchy.
Step 12:
Populate the Button Reg and Button Over variables for each
by dragging the respective textures from the Project panel's 2D Assets
folder. So, for instance, for InventoryButton_EMP, the Button Reg variable
should be populated with ButtonInventory-EMP texture (from the Project
panel) and the Button Over variable should be populated with the
ButtonInventory-EMPText texture, and so on (
Figure 16.3
).
Figure 16.3
The button-swapping
script in action.