Game Development Reference
In-Depth Information
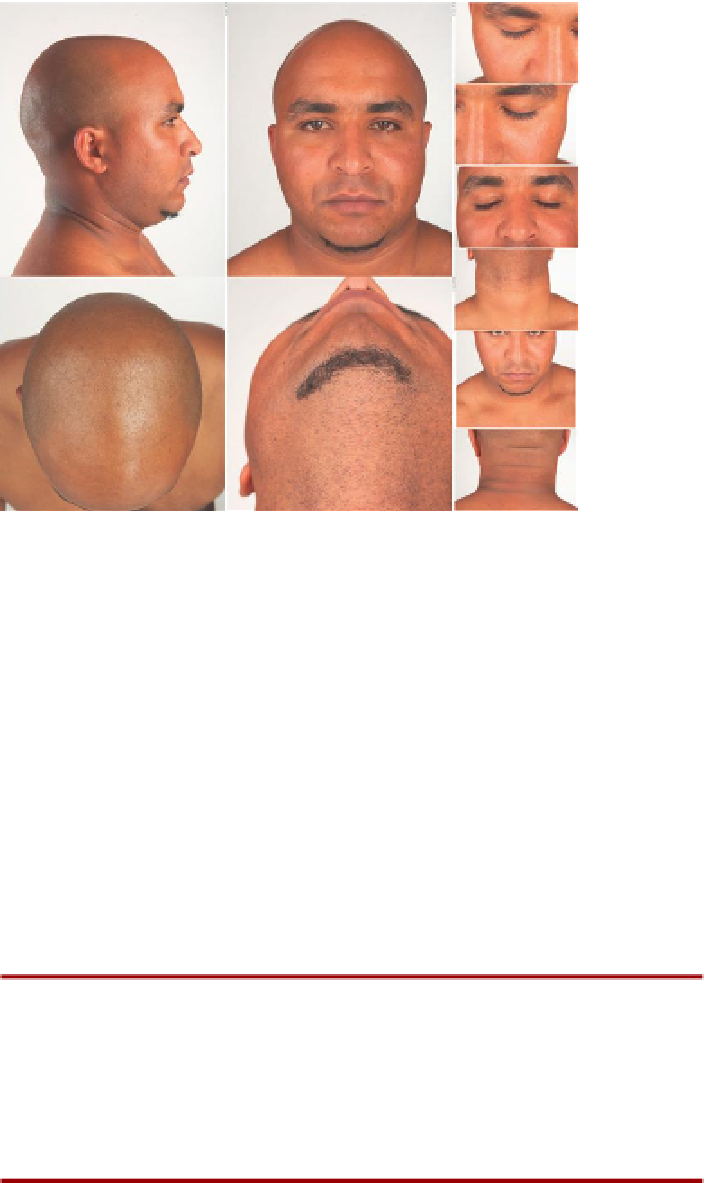
Figure 9.52
Sampling of the types
of image available at 3d.sk and the
images we will be using for this
tutorial.
use in your scenes. 3D.sk isn't free, it is a subscription service, but is well worth it.
Even if you subscribe for a month for each character created, it is well worth it.
3D.sk has graciously agreed to allow a sampling of their images to be included
on the supporting web site (
http://www.Creating3dGames.com
) for this topic
for use in the tutorial.
Step 22:
Either grab the face textures package off the supporting web
site, or go to 3d.sk and download a collection of images that provide a
good front, side, and top image of the source texture.
Why?
Remember there is no need to find a subject that looks like your character
(we are about to really change the shape of the image); but do look for
skin tones and history (scars, etc.) that will help communicate who your
character is and where he is from.
Step 23:
In Photoshop, copy and paste the front view into the raw
AegisChung texture (
Figure 9.53
).
Step 24:
Use Liquefy for a quick pass of adjusting. Choose Filter>Liquefy.
Move the pixels for the eyes, nose, and mouth (although we will give
considerable attention to the mouth later), to more approximate the
polygons they are to represent (
Figure 9.54
).
Tips and Tricks
Using the Liquefy tool is a lot of fun. The trick is to be sure to use varying
sizes of brushes to avoid really noticeable smearing, and use Show
Backdrop (bottom-right corner) to dial in the UV guides to make sure you
are liquefying into the proper place.