Game Development Reference
In-Depth Information
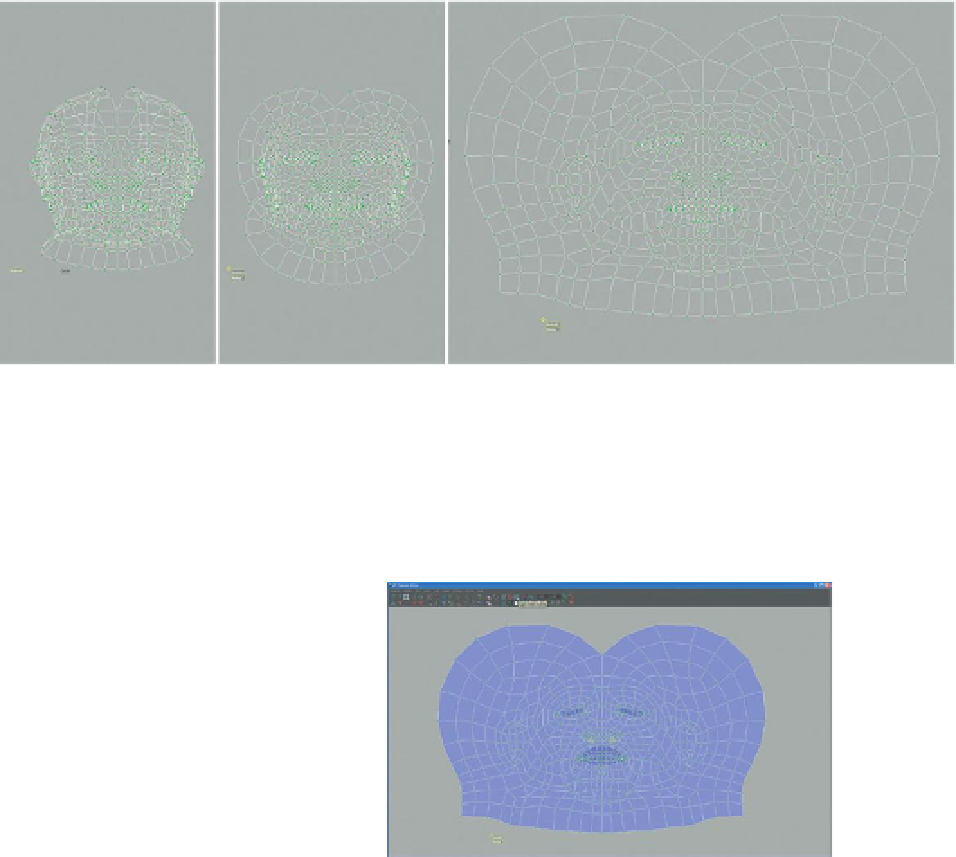
Figure 9.33
Unfolding the head.
Step 45:
Look for overlapping regions of UV. In the UV Texture Editor
toggle the UV-shaded display with the button shown in
Figure 9.34
. The
dark purple or red areas indicate where UVs are overlapping and thus
sharing texture space (this is bad).
Figure 9.34
Tracking down overlapping UV spots.
Step 46:
Relax. Select the region around one of the overlapping areas.
Don't be too stingy; notice in
Figure 9.35
that the selection is two rings of
UV out from the overlapping area. Activate the Smooth UV tool and this
time drag on the Relax button.
Step 47:
Repeat for any other overlapping areas.
Step 48:
Relax again. This time, select the entire shell. Go to Polygons>Relax
(Options). In Pinning, choose Pin UV Border and in Other Settings
activate World Space. Looking at the view panel and the UV Texture
editor, press the Apply Button once or twice (this may need to be
more or less—be looking to get a good balance of squares shifting to
distribute checkers well, but not so much that they begin stretching
too much around the lips and mouth). The solution for me was two
applies (at Maximum iterations 5 (the default)) and is shown in
Figure 9.36
.