Game Development Reference
In-Depth Information
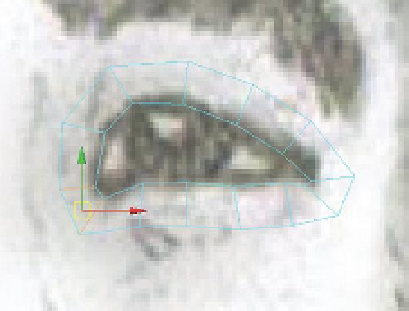
Step 17:
Extrude out the new polygon. Select the top polygon's edge
and use the Extrude tool (Polygons>Edit Mesh>Extrude) to then pull out
another polygon to roughly match
Figure 8.6
.
Figure 8.6
Extruding new polygons.
Tips and Tricks
Notice that in
Figure 8.6
the eye is no longer visible. It's not deleted, it's
just hidden. Sometimes having it there is important, but other times it just
makes things like the side view cluttered and unwieldy. To hide the eye,
select it and press Ctrl-H. It can be made visible again by selecting it in the
Outliner, then in the Channels Box, changing the Visible setting to On.
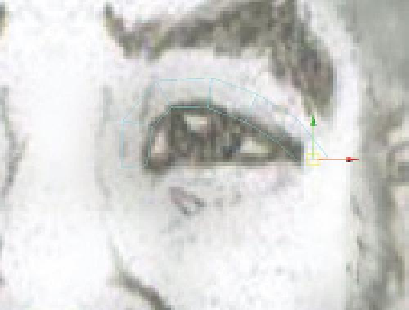
Step 18:
Repeat this process, being sure to rotate the new polys, to cover
the top lid (
Figure 8.7
).
Step 19:
Continue extruding and rotating around the bottom of the eye.
Step 20:
Use Append to Polygon to close the final gap. When the extrusions
have gone to where there would be one more polygon to complete the
ring, exit the Extrude tool and choose Polygons>Edit Mesh>Append to
Polygon Tool. Click the started edge of the first polygon, and then the
ending edge of the last polygon. A new polygon will appear, thus closing
the ring of polygons (
Figure 8.8
).
Figure 8.7
Top lid being formed.
Figure 8.8
Closing the ring with the Append to Polygons tool.