Graphics Programs Reference
In-Depth Information
To select the document type and set the testing server:
◗
1.
Open the
contact.html
page in Design view, open the
Server Behaviors panel
and collapse the CSS Styles panel.
You can press the
Ctrl+F9 keys to open
and close the Server
Behaviors panel.
◗
2.
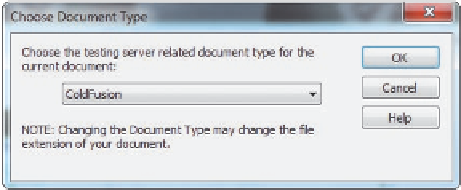
In the Server Behaviors panel, click the
document type
link. The Choose
Document Type dialog box opens. See Figure 9-26.
Figure 9-26
Choose Document Type dialog box
select the document type
Trouble?
If the document type in your list is different than the document type
in the figure, your default is set differently. You will select the document type in
Step 3.
◗
3.
Click the document type button, select
ASP VBScript
, and then click the
OK
button.
The Update Files dialog box opens. You will update the links in all the listed files.
◗
4.
Click the
Update
button to update the links. The page extension for the contact
page changes to .asp and the Update Files dialog box opens, indicating that the
contact.asp page could not be updated. You will update the link in the contact.
asp page yourself.
◗
5.
Click the
OK
button. A check mark appears in the Server Behaviors panel beside
Step 2 to indicate this step is complete (the check mark might not appear
immediately).
Trouble?
If the background image disappears from the pages of your site when
you view them in Dreamweaver, don't worry. The background image will be vis-
ible when you preview the page in a browser and when you view the pages over
the Internet.
Trouble?
If your instructor or IT department informed you that you will be using
something other than the ASP VBScript document type, you will select that docu-
ment type and your steps may differ somewhat from the remaining steps in this
section. If this is the case, ask your instructor or IT department for help.
◗
6.
In the Document window, select
contact
in the navigation text, and then, in the
Property inspector, delete
.html
from the Link box and type
.asp
. The contact link
is updated.
◗
7.
Save the page, and then upload the page to your remote server, including the
dependent files. (The contact.html page remains in the site's root folder but is no
longer used.)
Next, you'll complete Step 3 in the Server Behaviors panel.
◗
8.
In the Server Behaviors panel, click the
testing server
link in Step 3. The Site
Setup for NextBest Fest dialog box opens with the Servers tab displayed.
Check the Testing check box beside the NB web server. The Remote check box
should already be checked. See Figure 9-27.


Search WWH ::

Custom Search