Graphics Programs Reference
In-Depth Information
◗
3.
Click the middle-right resize handle on the table to make the Document window
active and keep the table selected. The pointer changes to
.
◗
4.
Press and hold the left mouse button, drag to the right about
150 pixels
until the
pointer is at 600 pixels on the ruler, but do not release the mouse button. A dot-
ted border shows the new dimensions of the table. See Figure 5-43.
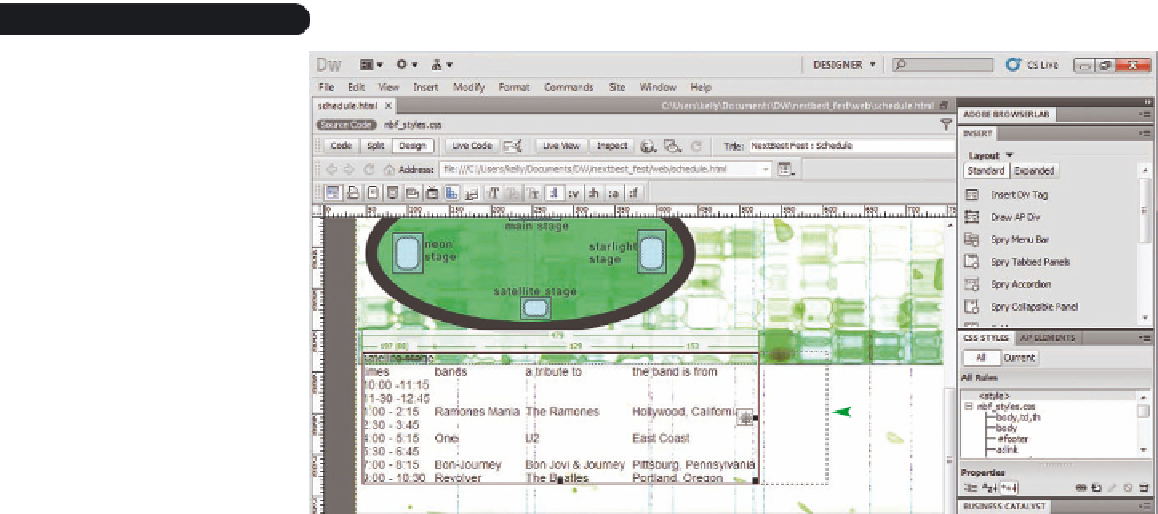
Figure 5-43
Table being resized
new dimensions
of the t
a
ble
Trouble?
If the exact numbers on your screen differ from those in Figure 5-43
(in other words, if the table is in a different position relative to the measurements
on the rulers), then your screen size is different from the one shown in the figure.
Continue with Step 5.
◗
5.
Release the mouse button. The Width value in the Property inspector changes,
reflecting the larger table size. The table doesn't need to be this large, so you'll
try a smaller size.
◗
6.
Drag the middle-right resize handle on the table to the left about
300 pixels
to reduce the table size. The Width value in the Property inspector reflects the
smaller table size.
The text is difficult to read in the smaller table, so you'll return to the original
table size.
◗
7.
In the Property inspector, double-click in the
W
box, type
450
, press the
Enter
key, and then make sure
pixels
is still selected. The table returns to its
original size.
Next, you'll move the table to another location.
◗
8.
On the Application bar, click
View
, point to
Rulers
, and then click
Show
. The rul-
ers are hidden.
◗
9.
Position the pointer in the upper-left corner of the selected table. The pointer
changes to .
Trouble?
If you have difficulty getting the pointer to change to the correct
shape, switch to Expanded Tables mode, perform Steps 9 through 11, and then
return to Standard mode.


Search WWH ::

Custom Search