Civil Engineering Reference
In-Depth Information
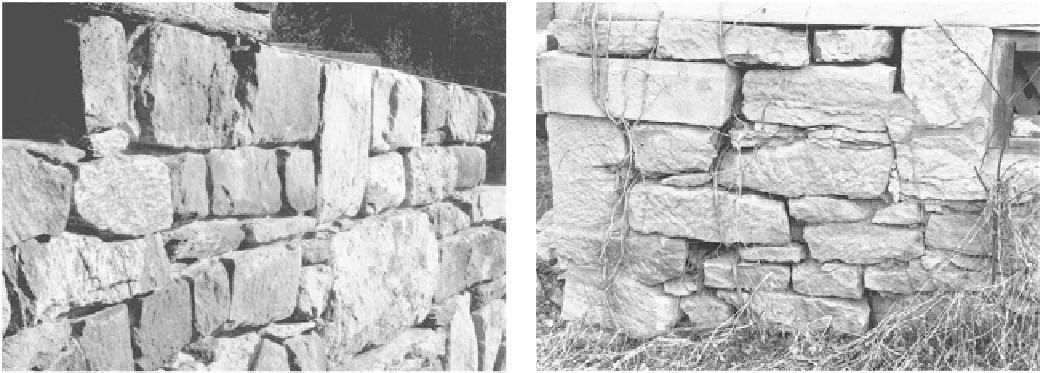
Large stones require no more time to lay than small ones. This mortared
stone foundation was for a log blacksmith shop restored as a cabin on
Greene Mountain in Virginia. The space for a foundation vent and the
metal flashing between masonry and sill are building code requirements.
Drystone foundations allow air to circulate under the house, which
keeps down moisture but makes the floors colder. Drystone requires
no footing or mortar but must be carefully laid to withstand flexing
from freezing and thawing earth.
bonding. Then trim any excess mortar. Rake the joint
at least half an inch deep so the faces of the stones
project. Try not to smear the mortar. You can clean up
the next morning with a wire brush.
A drystone foundation is more nearly authentic
pioneer, but is also a haven for snakes, and is often not
allowed by building codes. One advantage is that it's
less work, because no mortar is used and no footing is
necessary. Water can get under the stones and freeze
anyway, so there's no point to a footing below frost
line. Most of the water drains out from between the
stones naturally. This type of masonry requires good,
flat-surfaced stones, however. And that means a lot of
searching for the right rock, wedging between, or a lot
of stone cutting and dressing. A foundation obviously
shouldn't totter, or folks in your house will tend to
become uneasy. So wedge stonework with bits of rock
or metal. These shims should always be flat, or flexing
with temperature changes will drive them out.
In the process of the ground's freezing, swelling,
settling, and washing, you'll notice some changes in
your drystone foundation; but if your stones are good
and wide, and the piers cover a lot of ground area, you
can live with it nicely. Drystone lets air under your
house, making it colder in winter but keeping it drier.
I don't advise, however, letting your toddler stick his
fingers into those inviting, dark recesses after large,
curiously patterned “wiggle worms.”
Stone Foundation
Now, about the stones in the foundation. First of all,
haul in more than you could possibly need. You'll still
run short. If you can, get stone that's flat top and bot-
tom. The face is a matter for your own taste, but struc-
ture is important here, so lay as much as possible hor-
izontally. I've benefited from living in the Arkansas
and Missouri mountains with the best building stone
everywhere for the picking, and I've lived in Missis-
sippi and in central Virginia where rock gathering is a
long-distance adventure. Use a little mortar on the
footing concrete, maybe one inch thick, wetting it first,
just as you will for each course or layer of stone on pre-
vious drywork as you go up.
Lay the stone any way you choose, but cover the
joints between stones with the next layer, brick fash-
ion. You invite a cracked foundation if mortar joints
align vertically. I like to lay stone flat, or ledge, with
the edges showing. I vary this with a square, rounded,
or angled stone occasionally. A wall laid with the
stones standing on edge is weaker, unless very thick.
Make sure each stone will stay where you want it
before you mortar it. That way it will be there from
now on, even if the mortar erodes away, as did the
mud, clay, and lime mortar of earlier foundations and
chimneys. Lay about one inch of mortar, back from the
face an inch, then set the stone, rocking to ensure