Graphics Programs Reference
In-Depth Information
Step Nine:
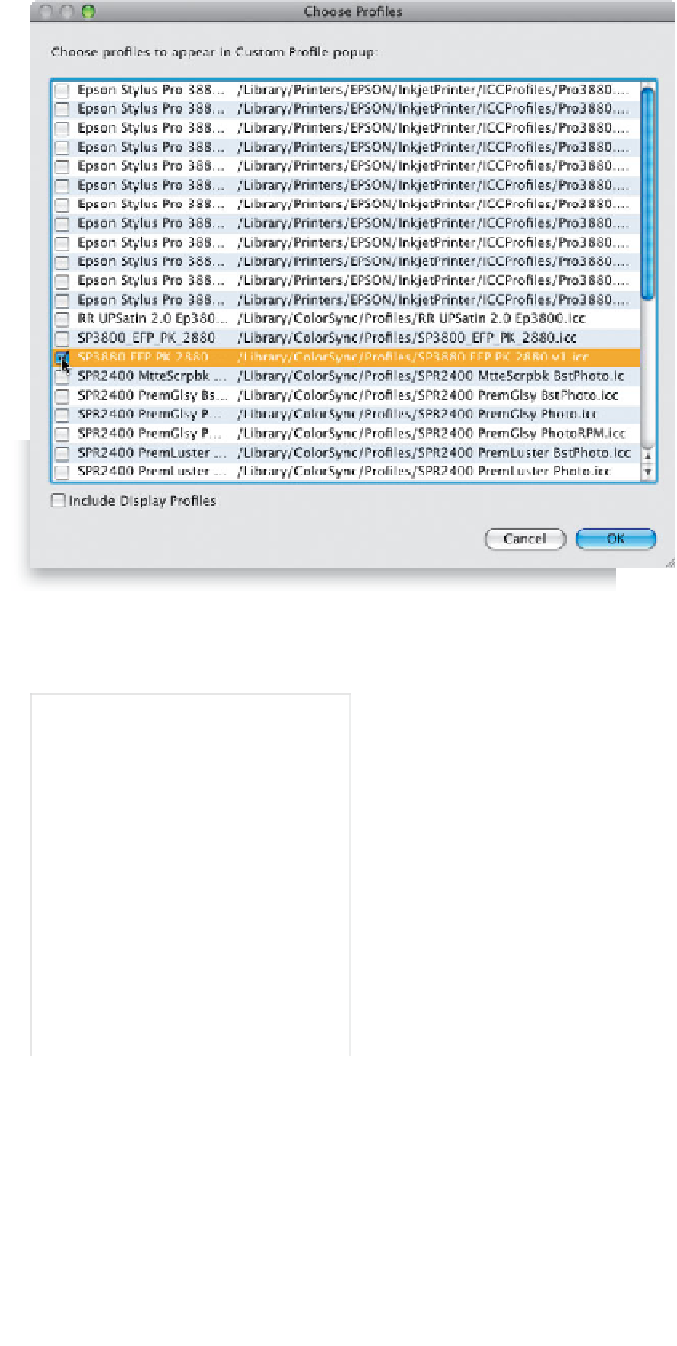
Once your color profile is installed,
click-and-hold on the Profile pop-up
menu (right where it says Managed by
Printer), and choose Other. This brings
up a dialog (shown here) listing all the
color profiles installed on your computer.
Scroll through the list and find the paper
profiles for your printer, then find the
profile(s) for the paper(s) you normally
print on (in my case, I'm looking for that
Epson Exhibition Fiber Paper, or EFP for
short), and then turn on the checkbox
beside that paper (as shown here). Once
you've found your profile(s), click OK to
add it to your pop-up menu.
Step 10:
Return to that Profile pop-up menu in
the Print Job panel, and you'll see the
color profile for your printer is now avail-
able as one of the choices in this menu
(as seen here). Choose your color profile
from this pop-up menu (if it's not already
chosen; in my case, I would choose the
SP3880 EFP PK 2880v1.icc, as shown
here, which is Epson's secret code for the
Stylus Pro 3880, Exhibition Fiber Paper,
PK, at 2880 dpi). Now you've set up
Lightroom so it knows exactly how to
handle the color for that printer on that
particular type of paper. This step is re-
ally key to getting the quality prints we're
all aiming for, because at the end of the
day, it's all about the print.


