Graphics Programs Reference
In-Depth Information
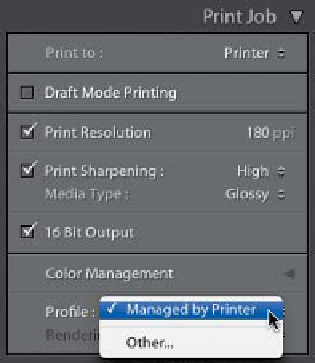
Step Seven:
Now it's time to set the Color Manage-
ment options, so what you see onscreen
and what comes out of the printer both
match. (By the way, if you have any hope
of this happening, you've first got to use a
hardware monitor calibrator to calibrate
your monitor. Without a calibrated monitor,
all bets are off. I use the X-Rite i1Display 2
to calibrate my monitor.) There are only
two things you have to set here: (1) you
have to choose your printer profile, and
(2) you have to choose your rendering
intent. For Profile, the default setting
is Managed by Printer (as shown here),
which means your printer is going to color
manage your print job for you. This choice
used to be out of the question, but today's
printers have come so far that you'll actu-
ally now get decent results leaving it set
to Managed by Printer (but if you want
“better than decent,” read on).
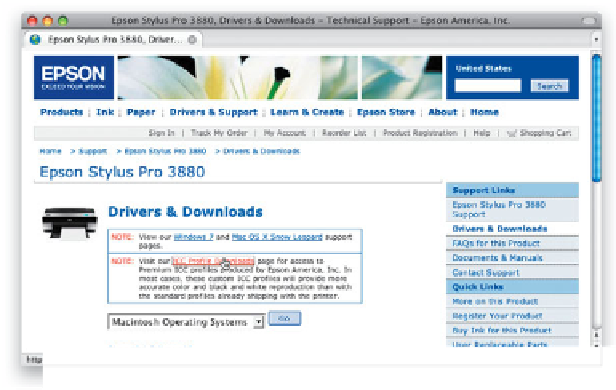
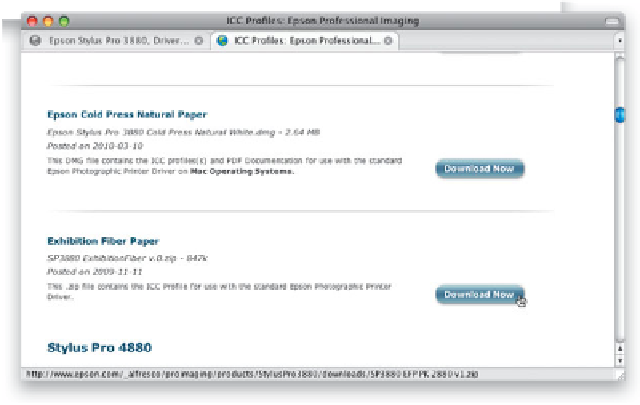
Step Eight:
You'll get better looking prints by a ssigning
a custom printer/paper profile. To do that,
first go to the website of the company that
manufactures the paper you're going to be
printing on. On their site, find the ICC color
profiles they provide for free downloading
that exactly match (a) the paper you're
going to be printing on, and (b) the exact
printer you're going to be printing to. In our
case, I'm printing to an Epson Stylus Pro
3880 printer, and I'm printing on Epson's
Exhibition Fiber Paper. So, I went to Epson's
website and, under Drivers & Support for
Printers & All in Ones, I found the 3880
downloads for a Macintosh. At the top of
that page, I clicked on ICC Profile Down-
loads, then clicked on the Download Now
button for Exhibition Fiber Paper under
Stylus Pro 3880, and installed the free color
profile for my printer. On a Mac, the un-
zipped file should be placed in your Library/
ColorSync/Profiles folder. In Windows Vista
or Windows 7, Right-click on the unzipped
file and choose Install Profile.
Continued