Graphics Programs Reference
In-Depth Information
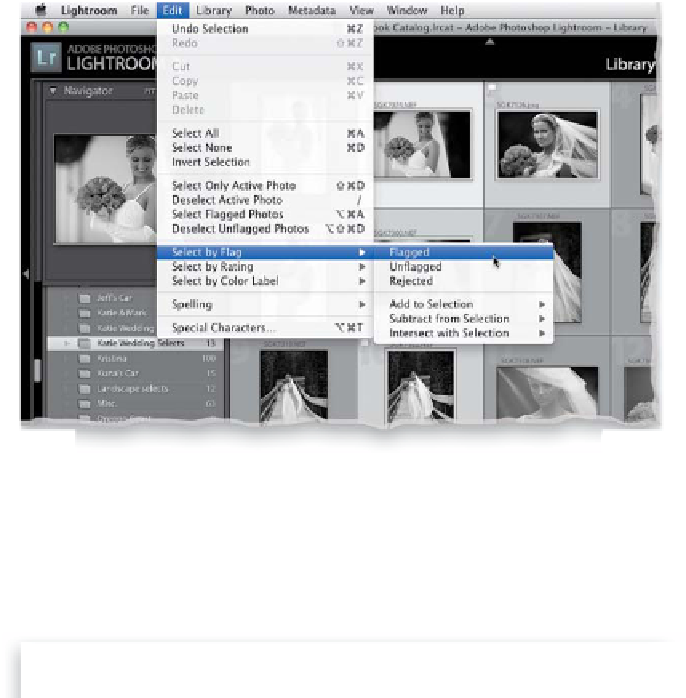
Step Three:
Press
G
to return to Grid view. Now, go
under Lightroom's Edit menu, under Select
by Flag, and choose
Flagged
(as shown
here), or just choose
Select Flagged Photos
from the Edit menu. This selects the images
you flagged as Picks (if, instead of using flags,
you added a color label or star rating, then
under the Edit menu, go under Select by
Color Label or Select by Rating). By the way,
selecting like this is different than turning
on the Picks filter down above the Filmstrip
or by using the Library Filter, because if we
did that, you'd only see the Picks. We want
to see all the images, but we want our Picks
selected, as if we had Command-clicked
(PC: Ctrl-clicked) on them. Now that the
photos that would make nice B&W images
are selected, press
Command-' (apostrophe;
PC: Ctrl-')
to make virtual copies of just
these images. These copies appear right be-
side the originals. Don't deselect just yet.
Step Four:
Now go back under the Edit menu, but
this time, choose
Invert Selection
to select
every photo
but
those virtual copies. Press
the letter V on your keyboard, again, and all
the images in that collection (except the
virtual copies) are now returned back to full
color (that's what I meant earlier when
I said this was temporary). Now, in your
collection, you have (1) all the original color
photos and (2) B&W virtual copies of the
ones that'll make good B&W images. Click on
any one of those virtual copies and jump
over to the Develop module, where you'll
start converting these to high-contrast
stunning B&W images, using the methods
you'll learn starting on the next page.
TIP: Grayscale Preview in the
Develop Module
We just learned that, in the Library module,
you can quickly see how your selected photos
would look as B&W photos by pressing the
letter
V
. This shortcut works in the Develop
module, too, but only on the selected photo
showing in the center Preview area.