Graphics Programs Reference
In-Depth Information
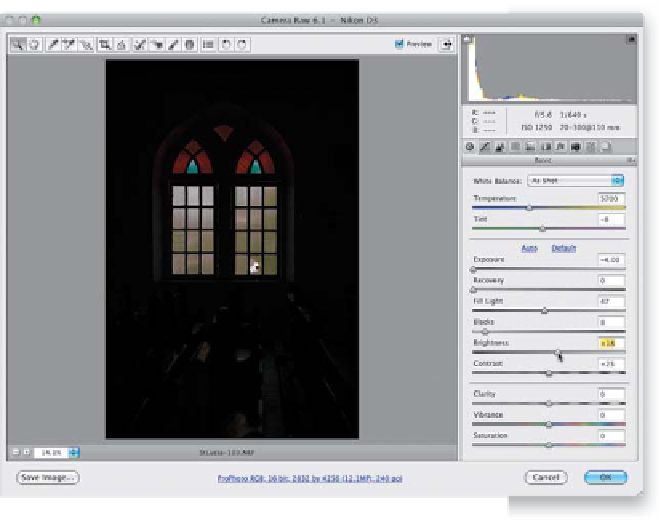
Step Five:
By the way, the reason I had you choose
New Smart Object via Copy, rather than
just duplicating the layer like always, is this:
when you duplicate a Smart Object layer,
the duplicate is tied to the original layer,
so if you edit the duplicate, the original
updates with the same changes (they're
essentially linked together). But when you
choose New Smart Object via Copy instead,
it does duplicate the layer, but it breaks
that link, and now you can edit each one
separately. So now, go to the Layers panel
and double-click on the duplicate layer's
thumbnail, which brings up the Camera
Raw window. Click-and-drag the Exposure
slider all the way to the left (like you see
here) and you start to see the detail that
actually is in the windows (you can now
see a raised pattern on the windows, and
that part of one of the panes is broken,
where you can see out to the street).
Now lower the Brightness, as well, until
the detail really comes out (as seen here).
By the way, did you notice that the sliders
are the same ones, in the same order, as
those in Lightroom's Basic panel in the
Develop module?
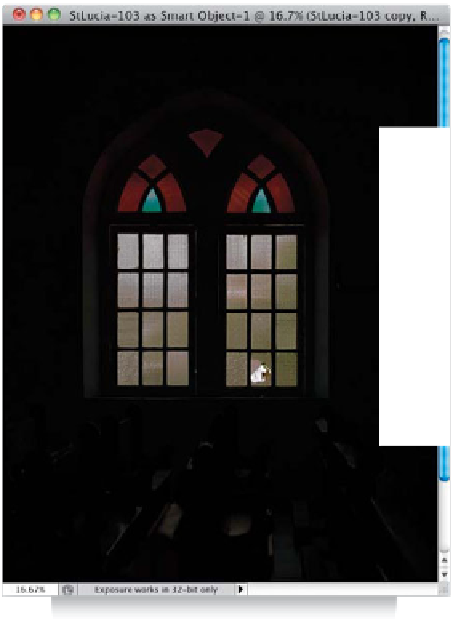
Step Six:
When you click OK, it applies those
changes, but just to the duplicate layer
(as seen here, in the Layers panel, where
the bottom layer is the Smart Object
exposed for the interior, and the top
layer is the darker one exposed for the
windows and what's outside). They are
perfectly aligned with one another—
pixel for pixel—right in the same posi-
tion, so now we'll be able to blend the
two together (in the next step).
Continued