Graphics Programs Reference
In-Depth Information
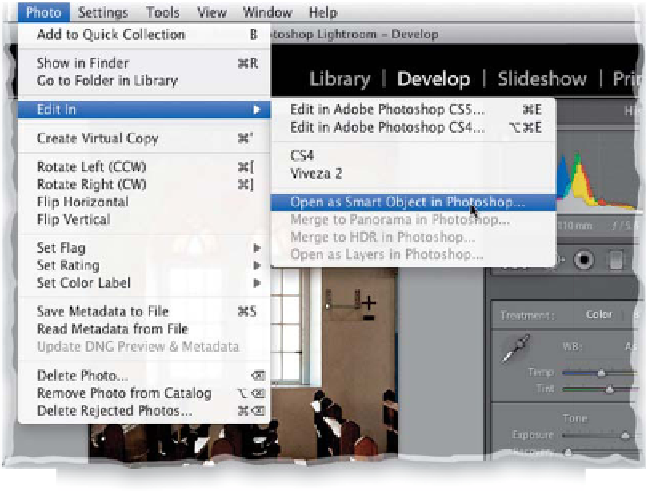
Step Three:
To take our image over to Photoshop as
a Smart Object, go under Lightroom's
Photo menu, under Edit In, and choose
Open as Smart Object in Photoshop
(as shown here). Because this photo was
taken in RAW format, it will actually
open the RAW photo in Photoshop
(just like when you normally export to
Photoshop), but Lightroom will create
a copy in TIFF or PSD format when you
save it. So, don't worry, your original
RAW file is still in Lightroom.
Step Four:
Here's the processed photo open in
Photoshop as a Smart Object (you know
it's a Smart Object by its name in the
title bar and by the little page icon that
appears in the bottom-right corner of
the layer's thumbnail in the Layers panel).
Now that we're here, I want to briefly
talk about the advantage of using Smart
Objects: in this case, the main advantage
is you can reprocess your image anytime
in Adobe Photoshop's Camera Raw (which
has the exact same sliders and controls
as the Develop module in Lightroom, so
you'll feel right at home), so you can
make your adjustments there, and when
you click OK, your changes are applied
to the photo. This will make more sense
in a moment as we put this to use. Now
we need to create a second version of
this image—one exposed for the win-
dows—so Right-click on the Smart Object
layer, and from the pop-up menu that
appears, choose
New Smart Object via
Copy
(as shown here).