Graphics Programs Reference
In-Depth Information
Some cameras seem to put their own color signature on your photos, and if yours is
one of those, you might notice that all your photos seem a little red, or have a slight
green tint in the shadows, etc. Even if your camera produces accurate color, you still
might want to tweak how Lightroom interprets the color of your RAW images.
The process for doing a full, accurate camera calibration is kinda complex and
well beyond the scope of this topic, but I did want to show you what the Camera
Calibration panel is used for, and give you a resource to take things to the next level.
Step One:
Before we start, I don't want you to think
that camera calibration is something every-
body must do. In fact, I imagine most peo-
ple will never even try a basic calibration,
because they don't notice a big enough
consistent color problem to worry about it
(and that's a good thing. However, in every
crowd there's always one, right?). So, here's
a quick project on the very basics of how
the Camera Calibration panel works:
Open a photo, then go to the Develop
module's Camera Calibration panel,
found at the very bottom of the right
side Panels area, as shown here (see, if
Adobe thought you'd use this a lot, it
would be near the top, right?).
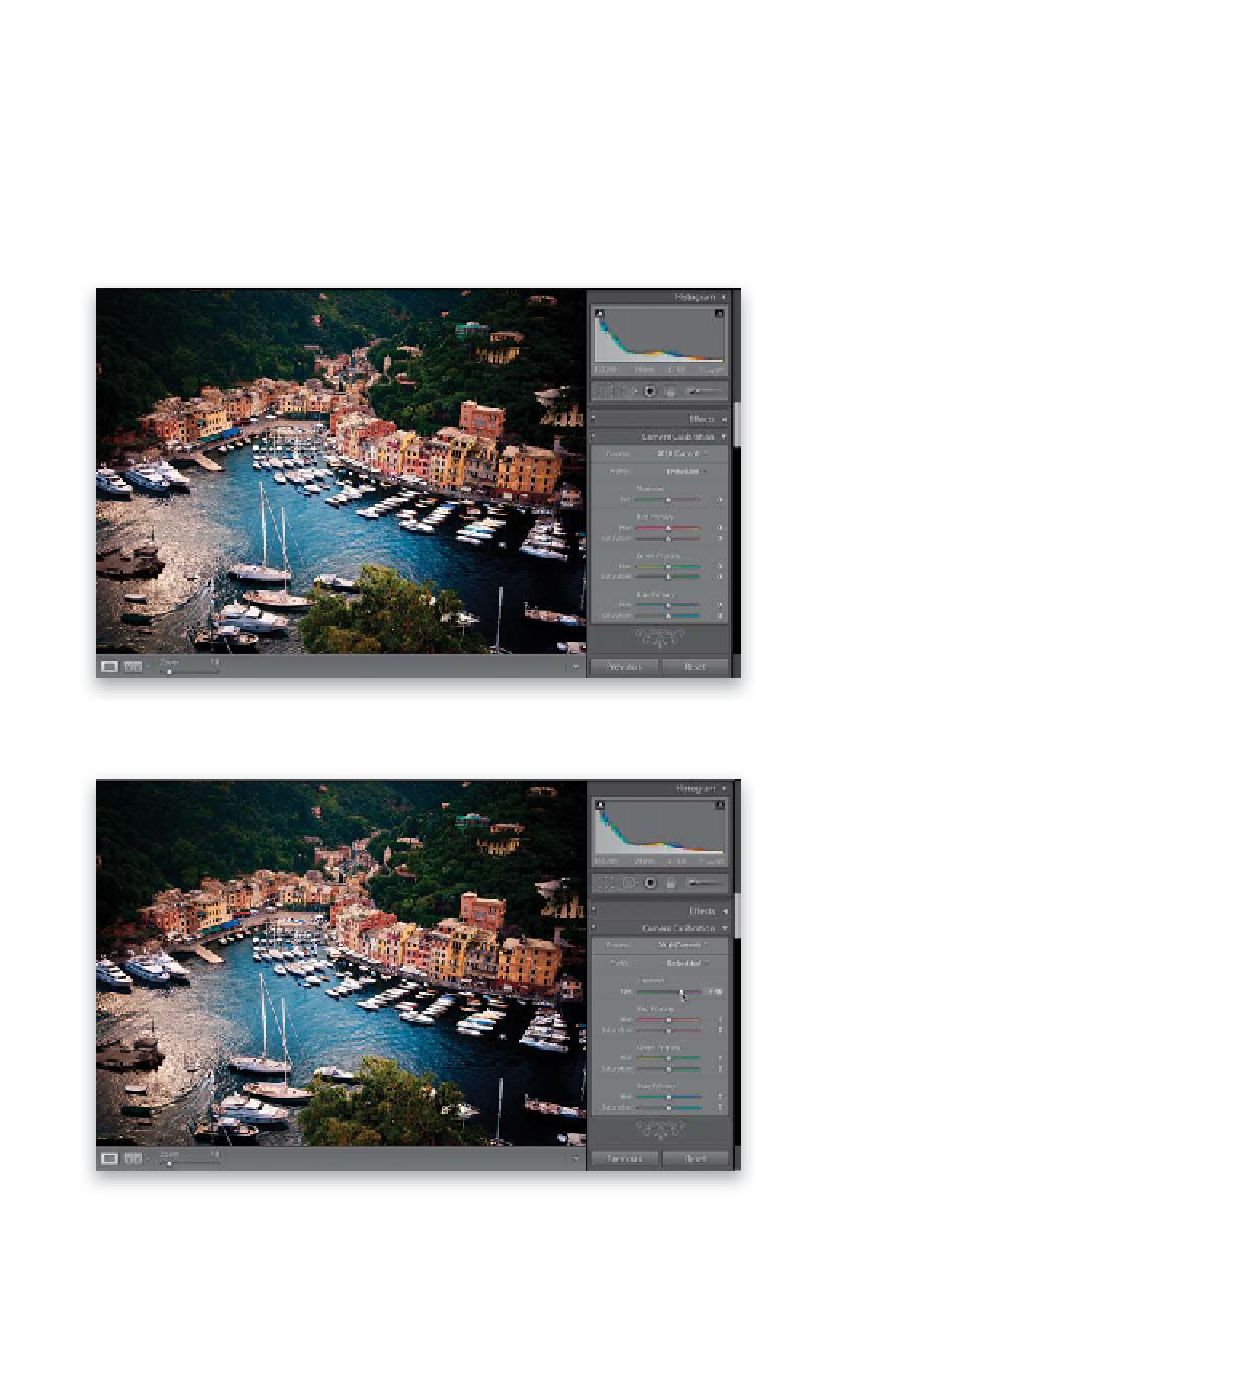
Step Two:
The topmost slider is for adjusting any tint
that your camera might be adding to the
shadow areas of your photos. If it did add
a tint, it's normally green or magenta—
look at the color bar that appears inside
the Tint slider itself. By looking at the
color bar, you'll know which way to drag
(for example, here I'm dragging the Tint
slider away from green, toward magenta,
to reduce any greenish color cast in the
shadow areas, but the change in this
particular photo is very subtle).
Continued